Integrating ADFS SAML
This article provides sample ADFS SAML integrations.
ADFS
ADFS Configuration UI may vary across different versions of ADFS. Always refer to the Relying party configuration section of the ADFS administration guide.
-
Get ADFS SAML metadata.
Note
Normally, ADFS metadata can be found under the below URL. Double-check it with your ADFS administrators to confirm the metadata URI before proceeding.
https://CHANGEHOSTNAME/FederationMetadata/2007-06/FederationMetadata.xml -
Register ADFS as an external IDP in CIP. For more information, see Configure external IDPs.
-
Download CIP SAML SP metadata. For more information, see Download SAML IDP metadata.
-
Configure ADFS to register CIP service as a SAML Relying Party using CIP metadata.
Note
In the UI, you can follow this path: Server Manager » Tools » AD FS Management » Actions » Add Relaying Party Trust.
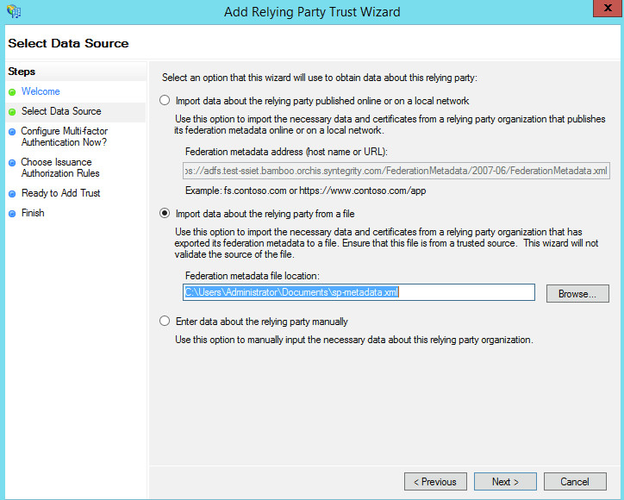
Tip
Once you pass the introduction page by selecting Start, you can select how to enter data into ADFS. ADFS cannot handle a URL with a query string, therefore you need to feed the metadata manually. Click Next to import the data.
-
Configure attributes that need to be released in ADFS.
-
Edit the Claim Rules dialog box and select Add Rule.
-
Select Next - you need to use the default template to send LDAP Attributes as Claims.
-
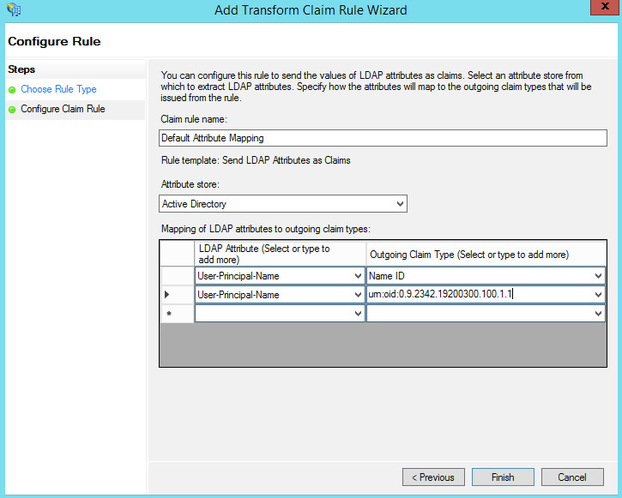
Give the claim rule a descriptive name and make sure Active Directory Attribute Store is selected.
-
Examine the table below. On the left you have the AD attributes that you need to select, on the right you have the outgoing claim type.
-
Specify at least the following two attributes:
Name IDandurn:oid:0.9.2342.19200300.100.1.1. -
When done, select Okay and, next, OK to exit the Edit claim rules dialog box.
Tip
You can return to it by right-clicking the claim in the AD FS Management window.
-
-
Verify the SAML authentication flow with Okta. For more information, see Verify SAML authentication flow.