Configuring authorization policies
This article explains how to configure policies in Cloud Identity Plane.
Prerequisites
You have relevant administrator privileges.
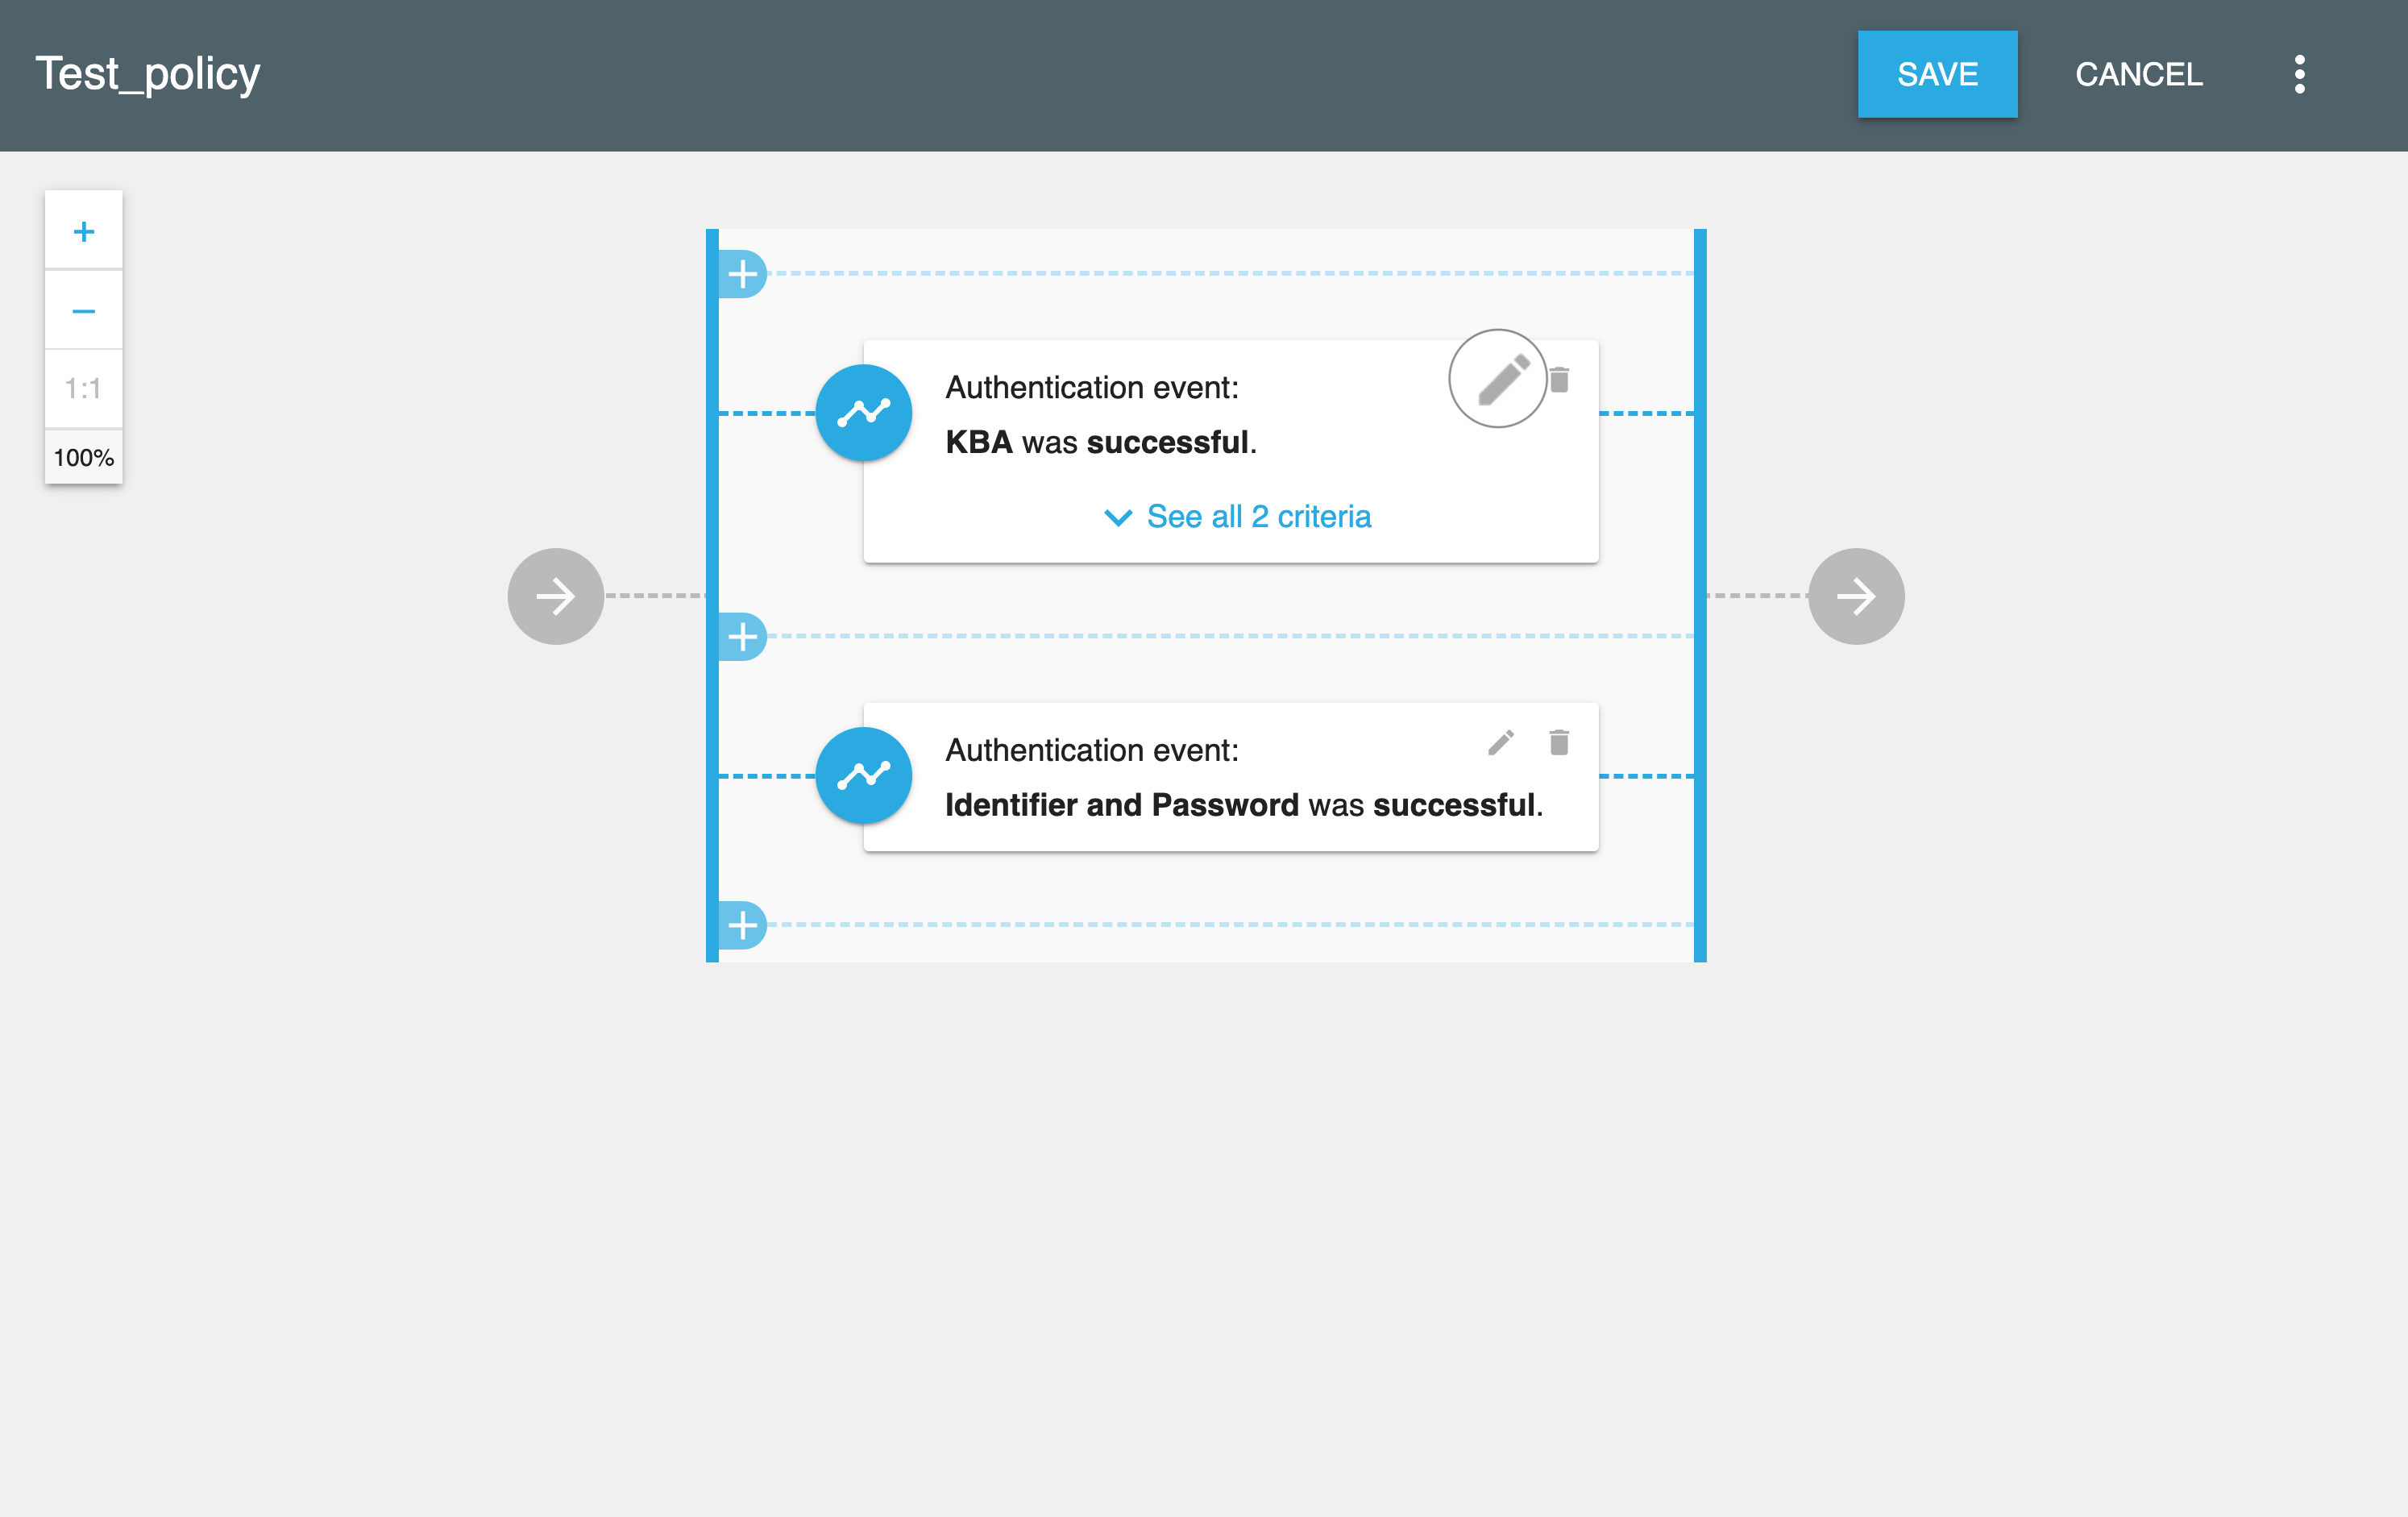
Configure a policy
-
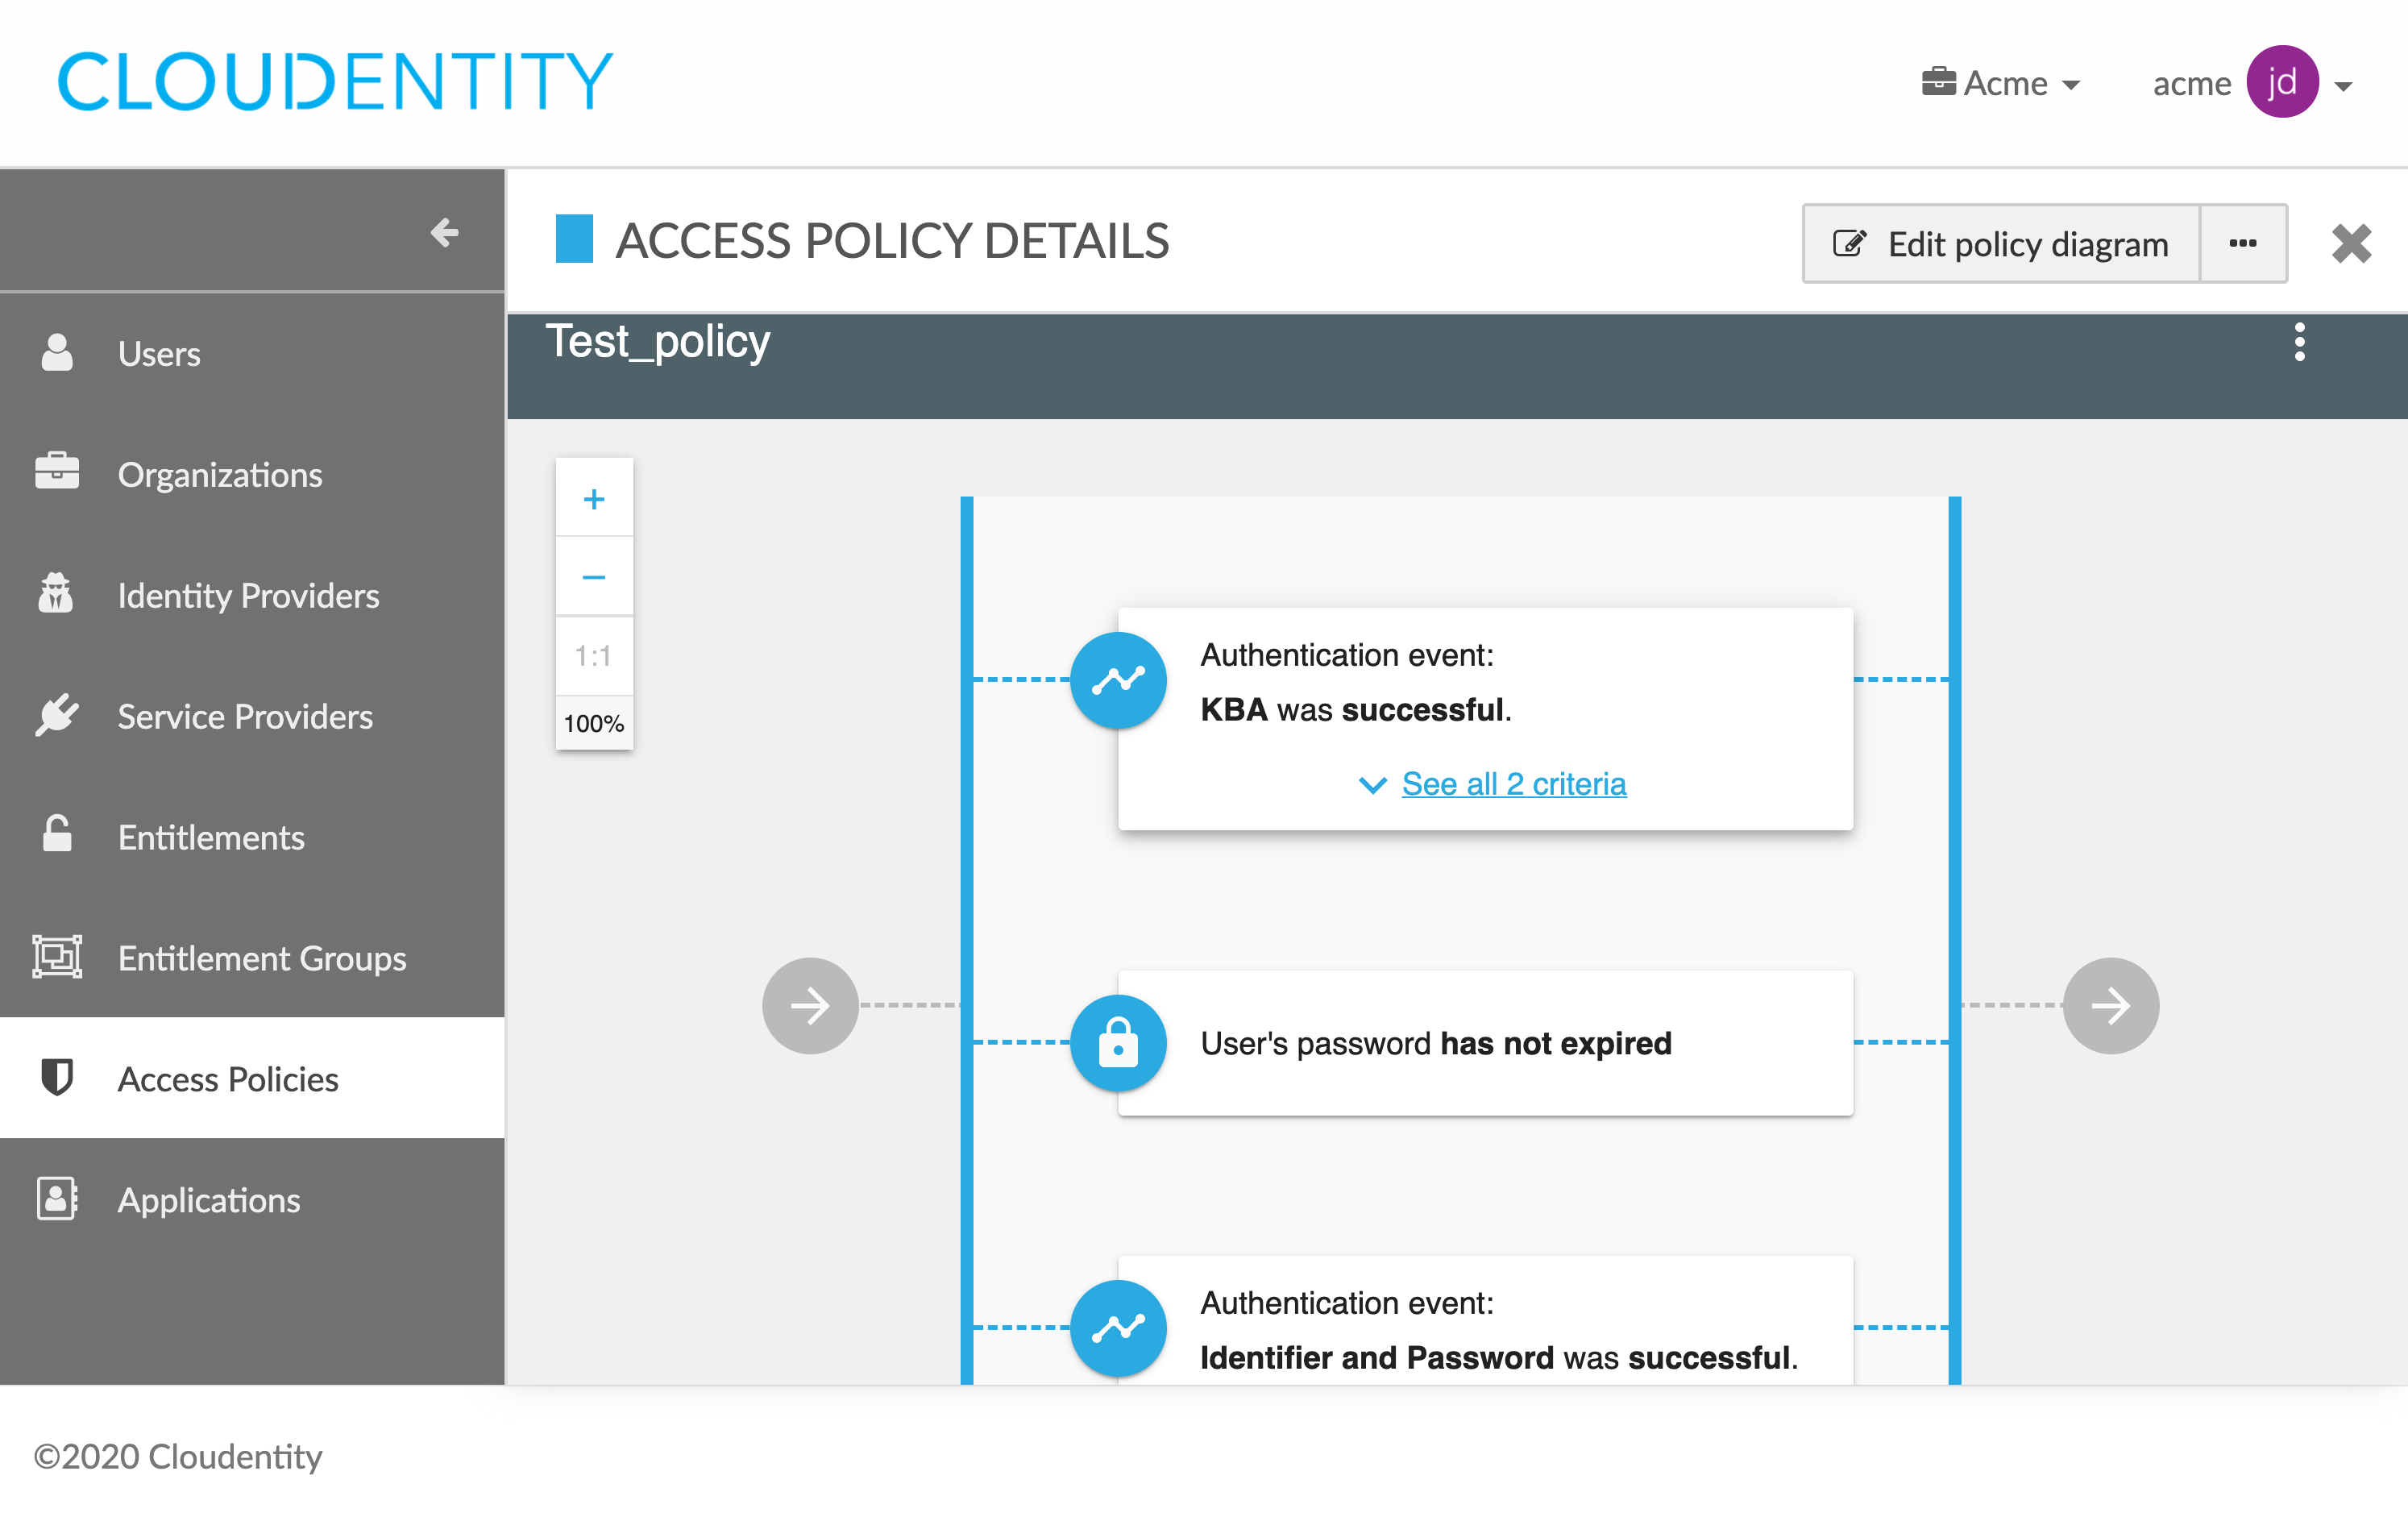
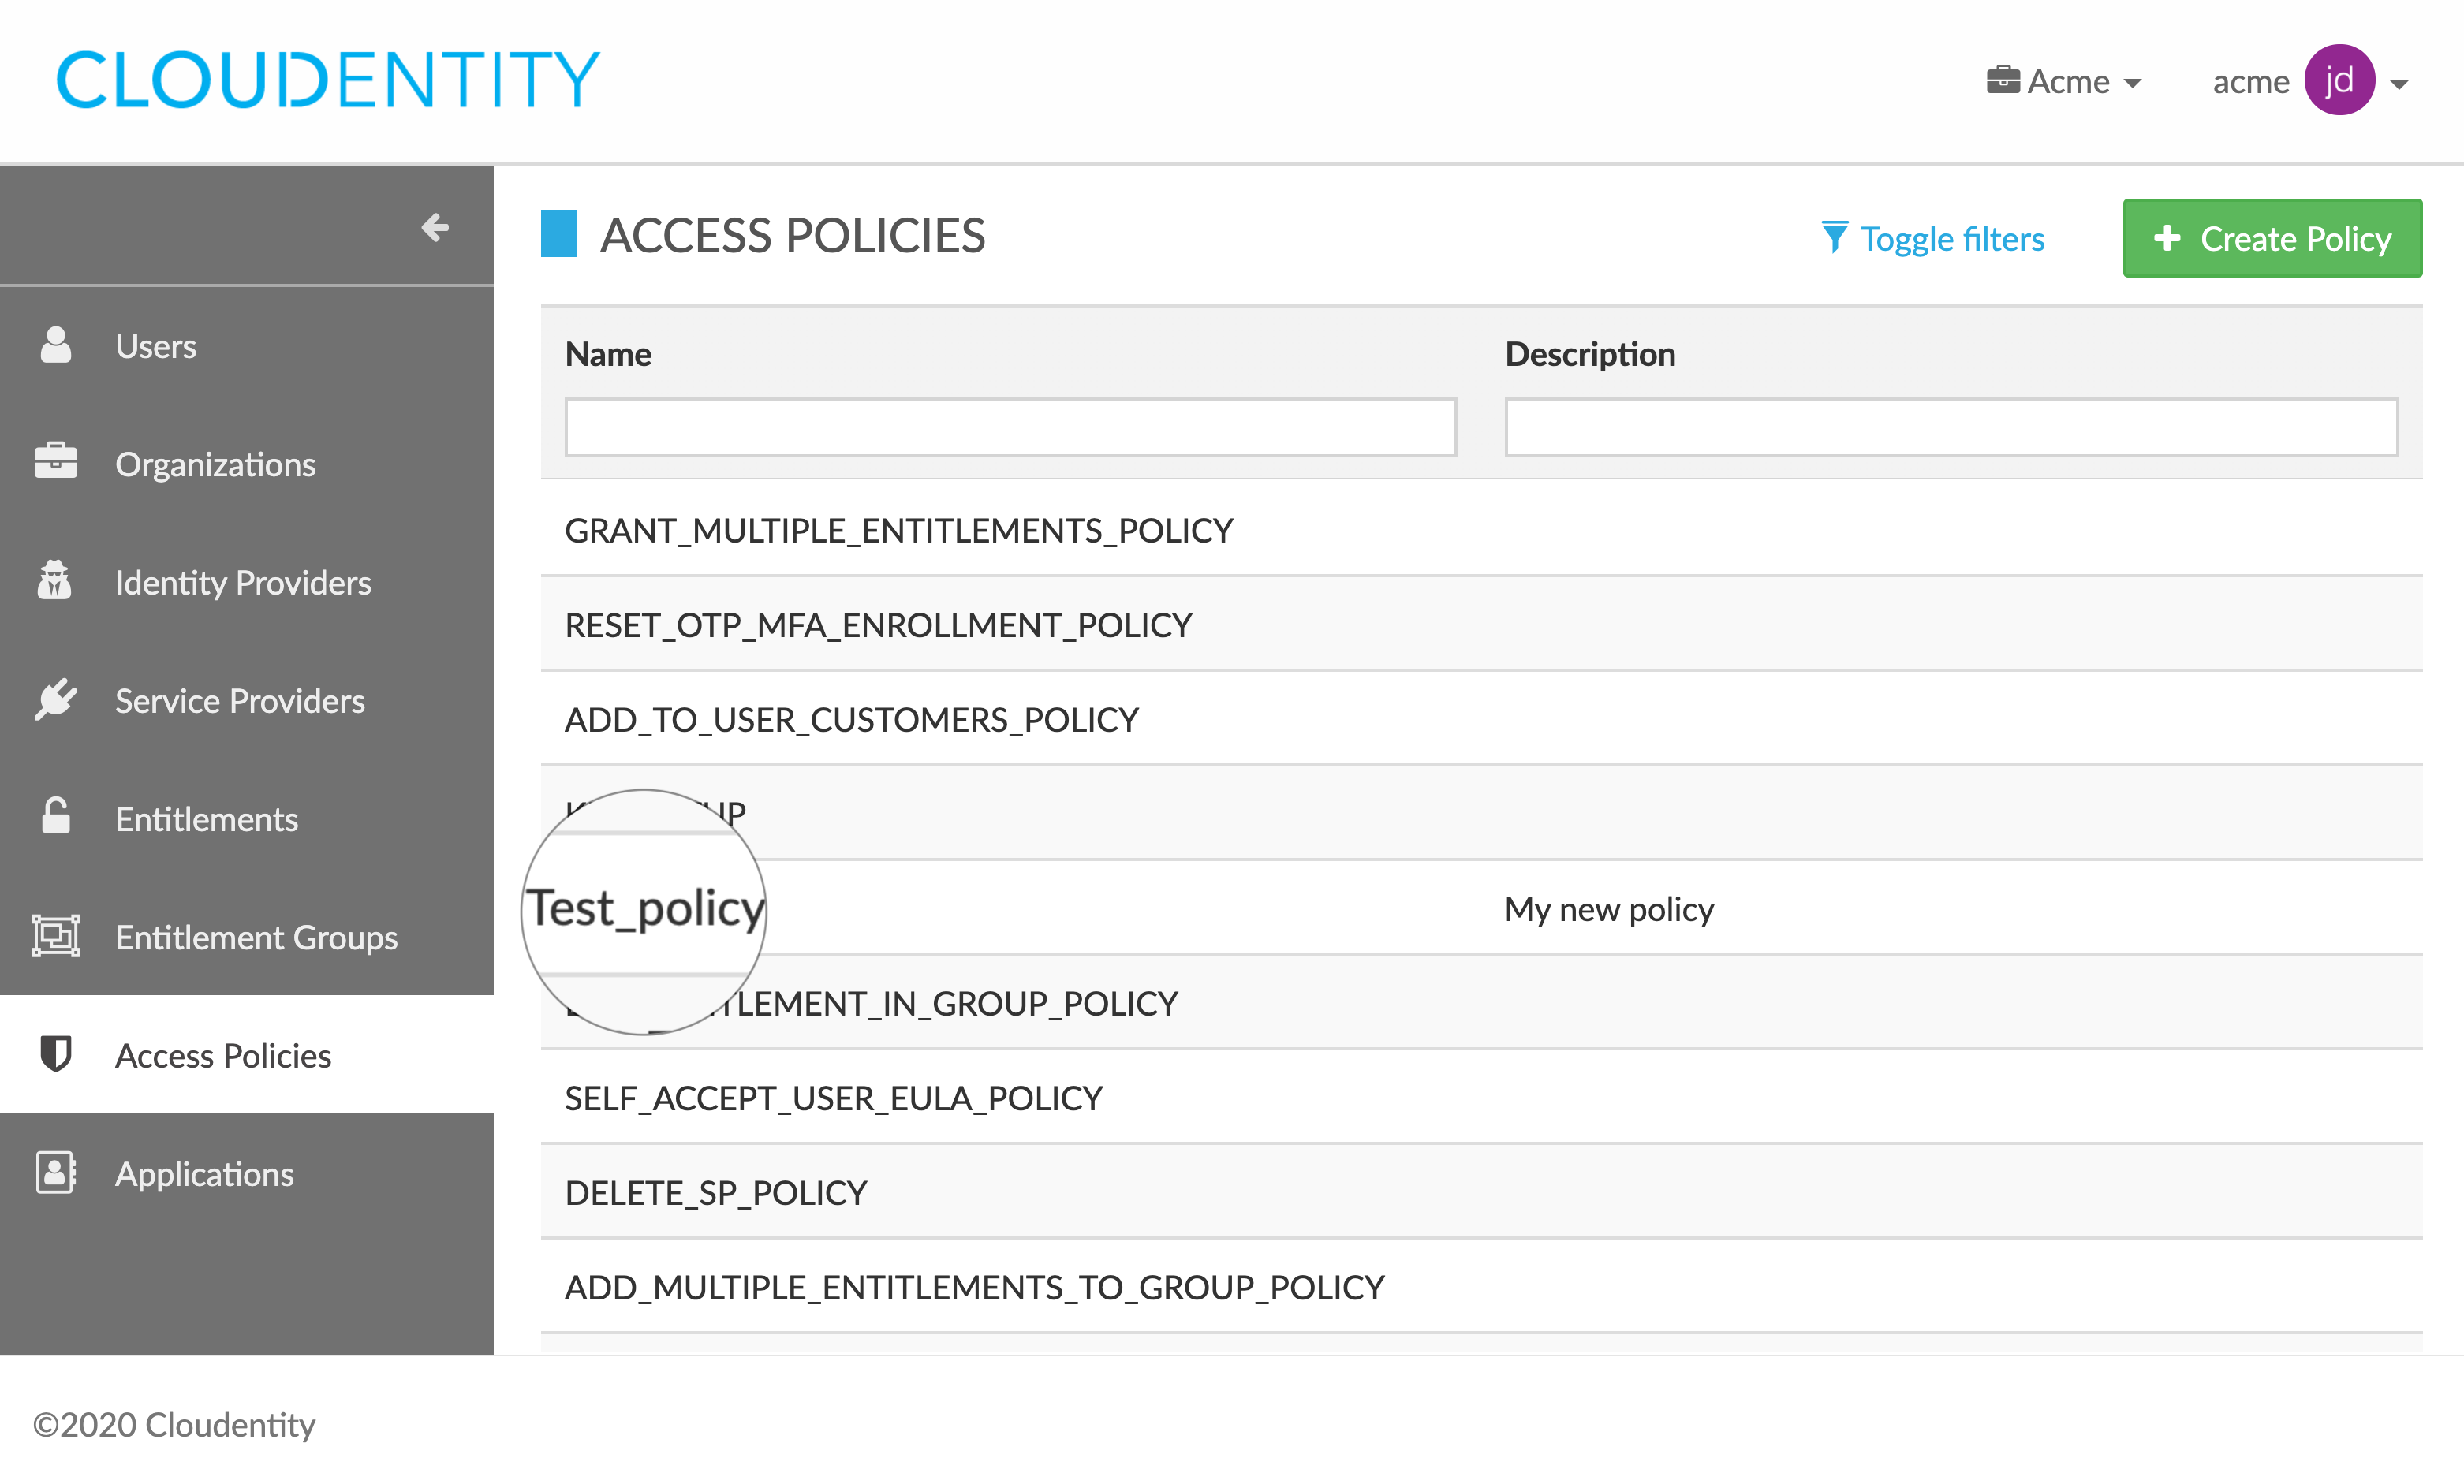
In the ACCESS POLICIES view, select one of the policies from the policies list.
-
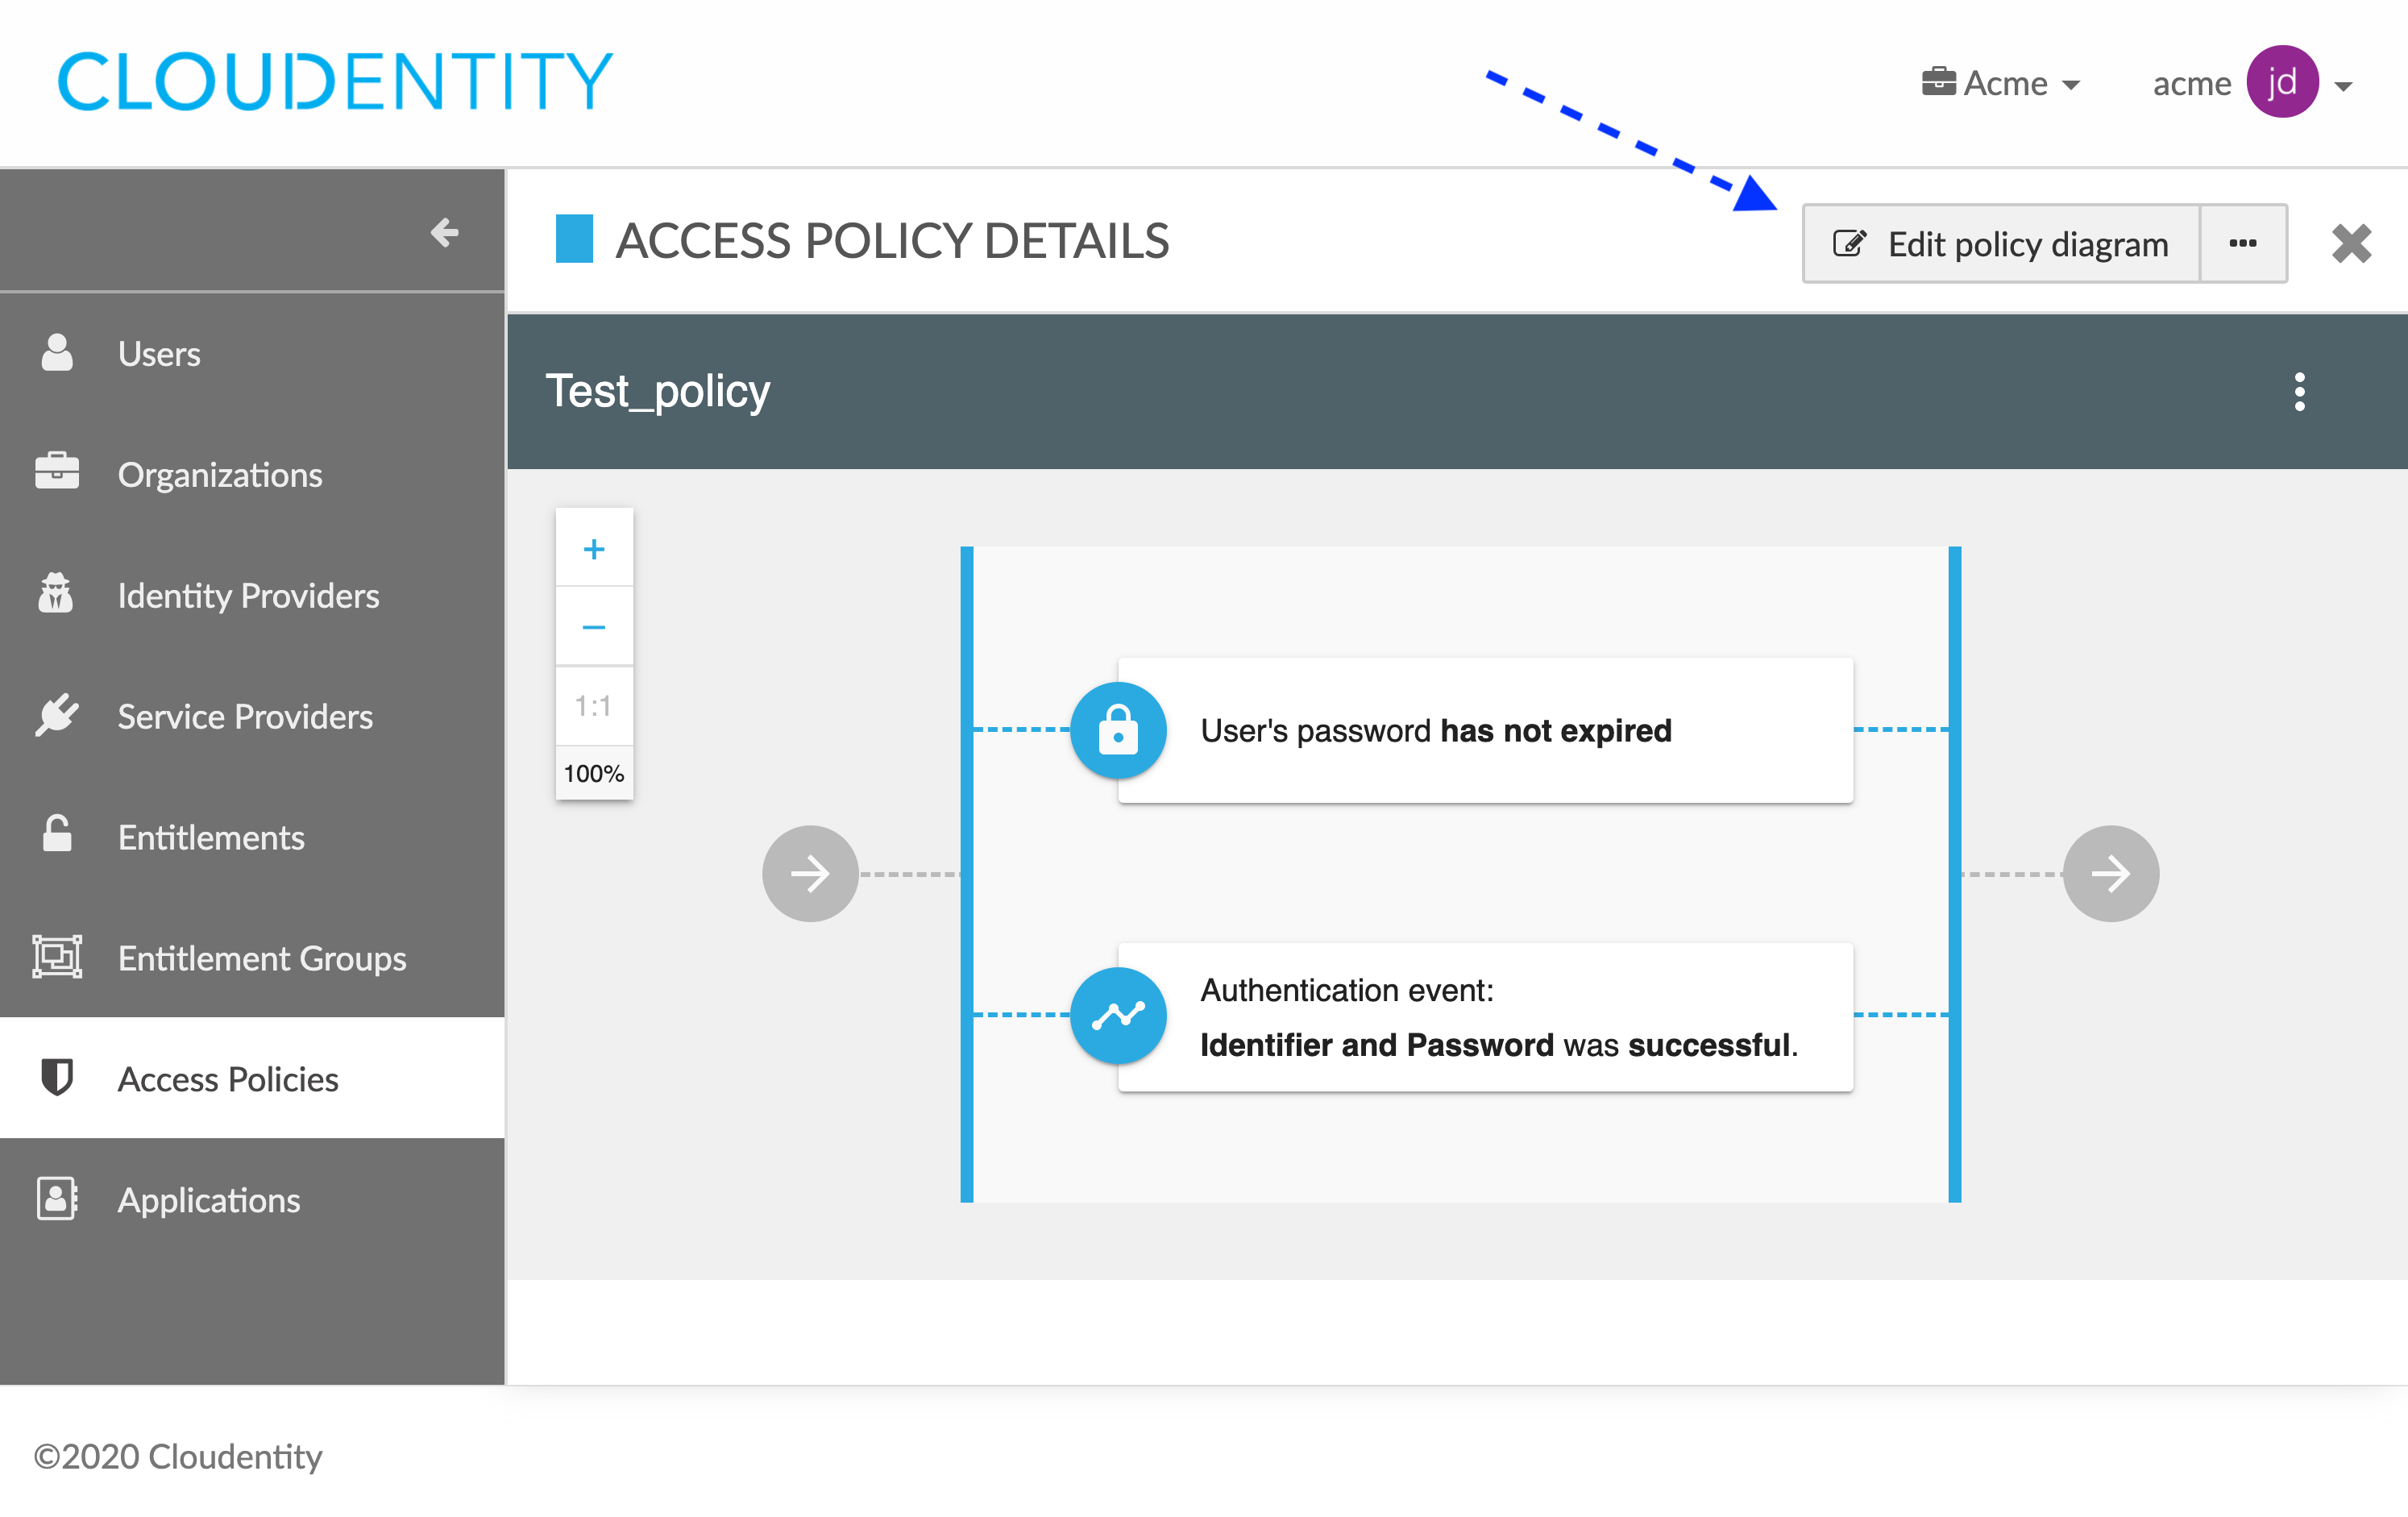
In the ACCESS POLICY DETAILS fly-out view, select Edit policy diagram.
-
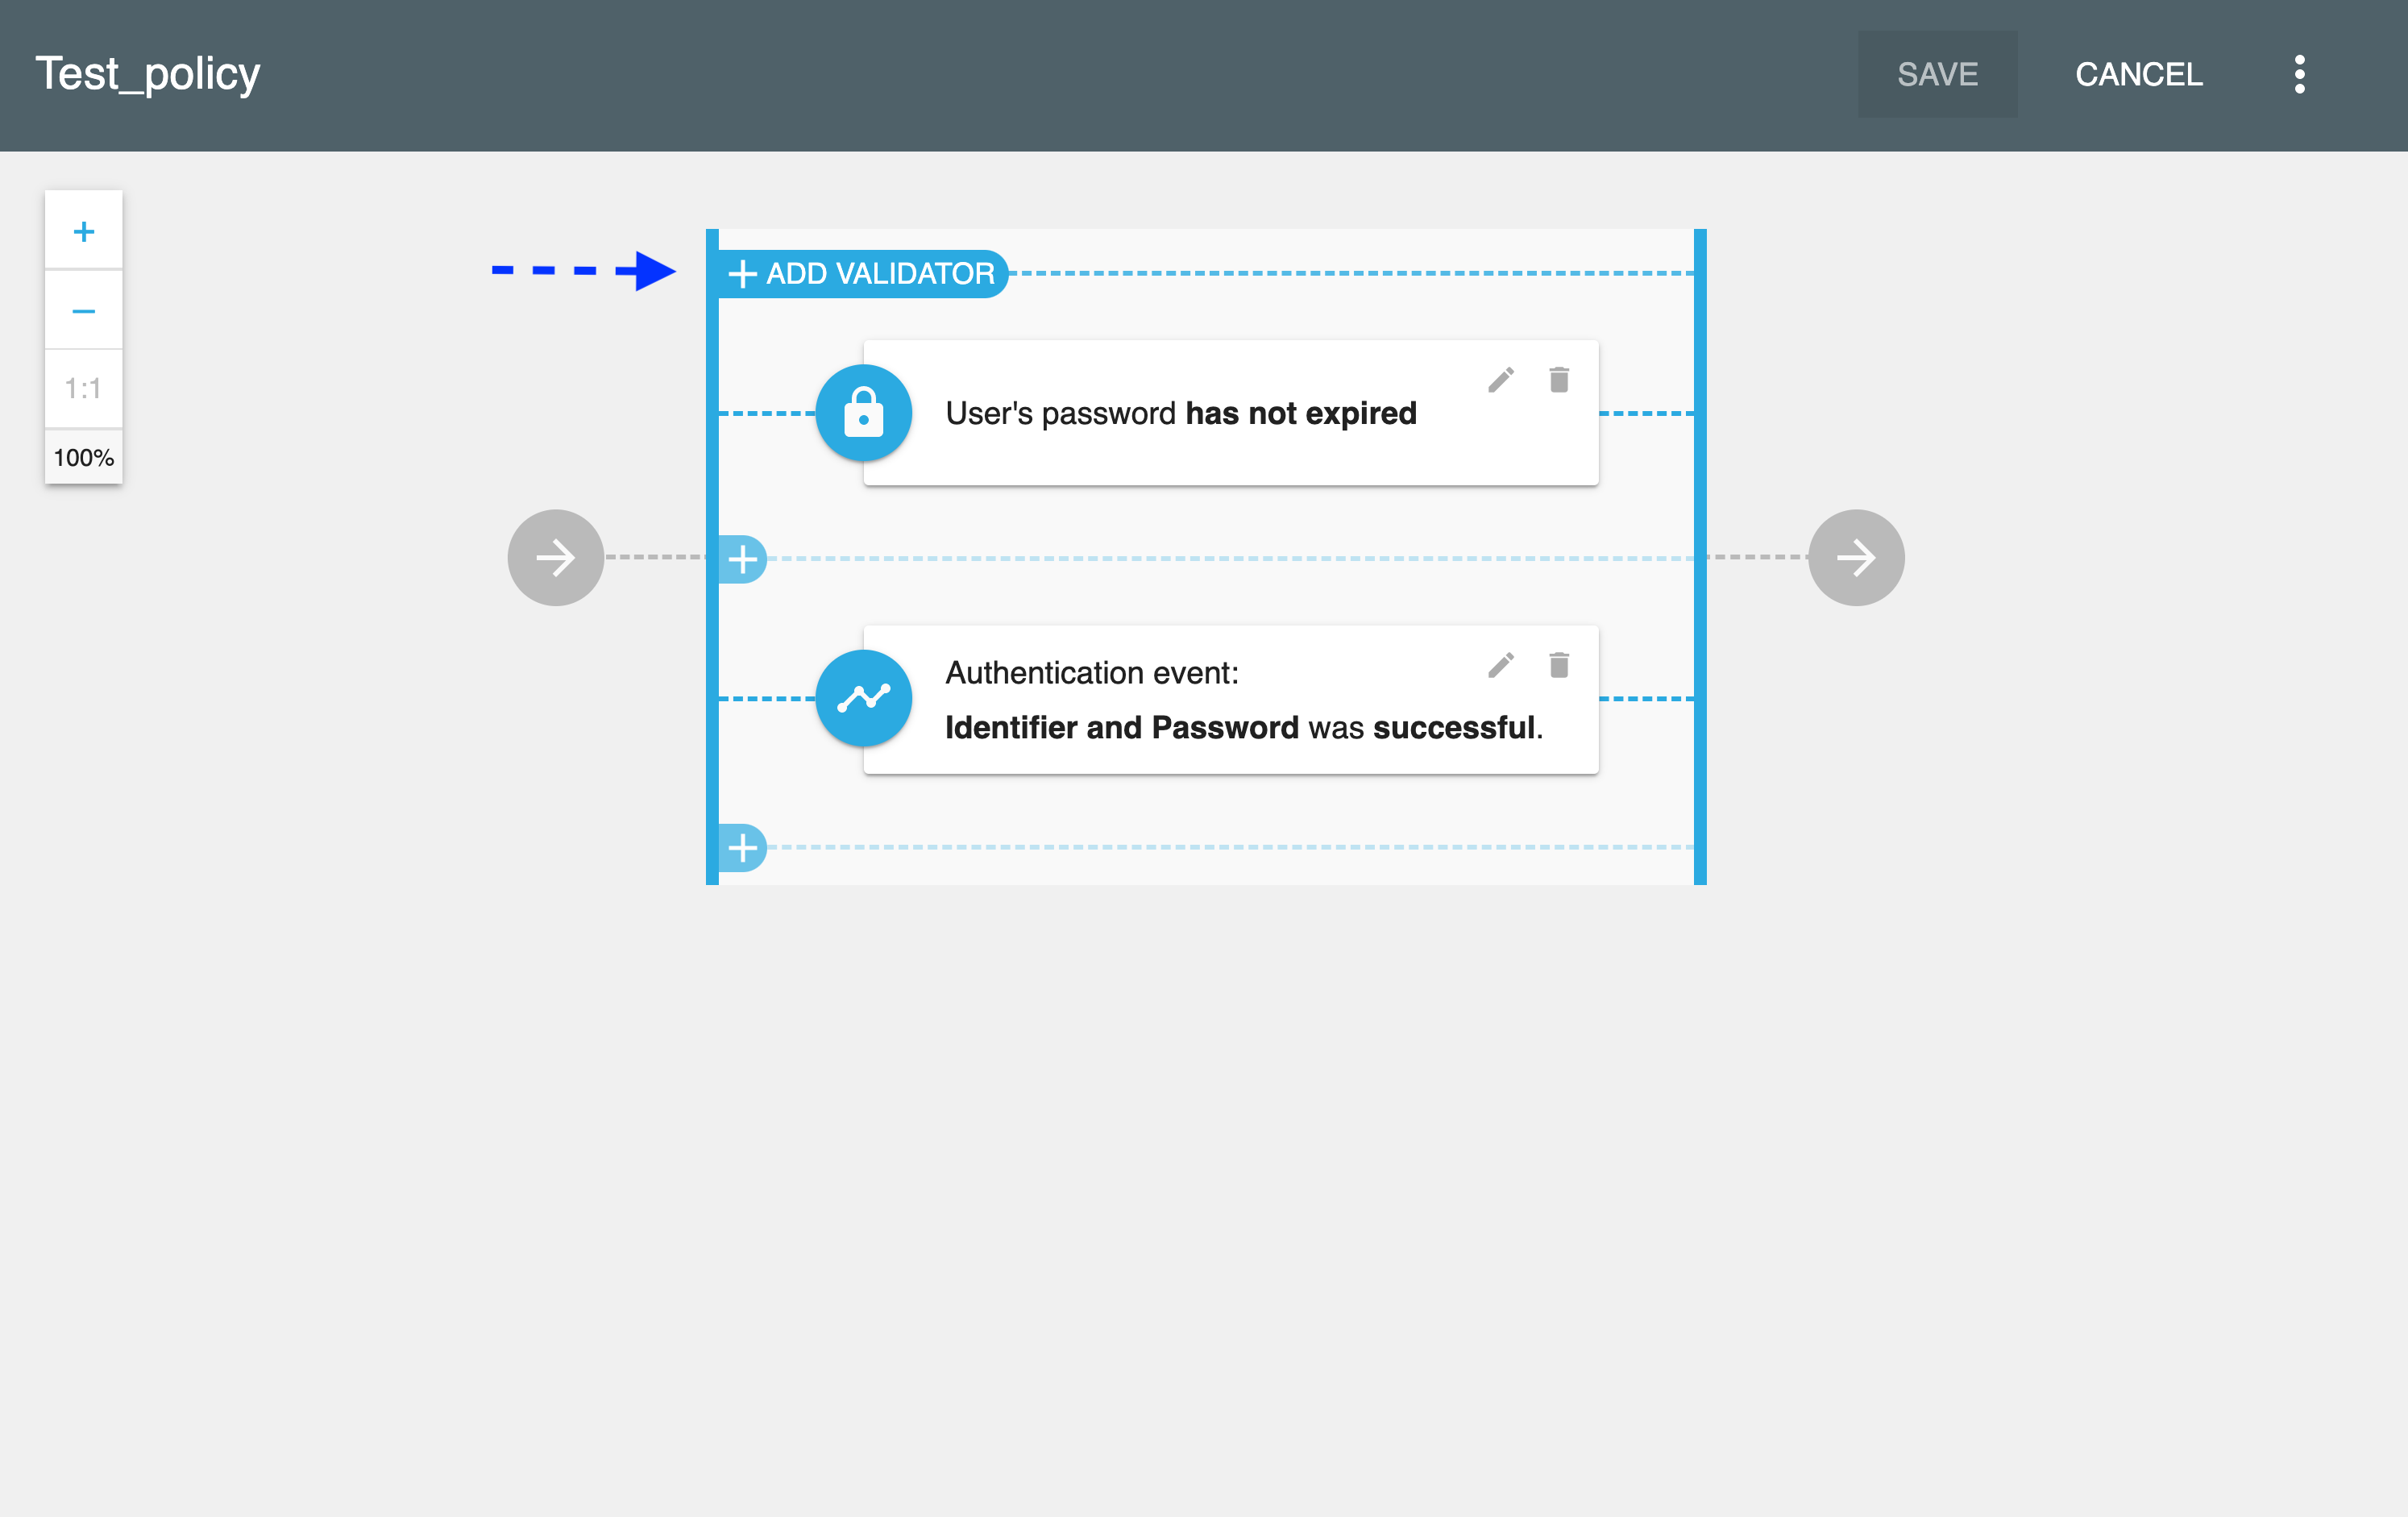
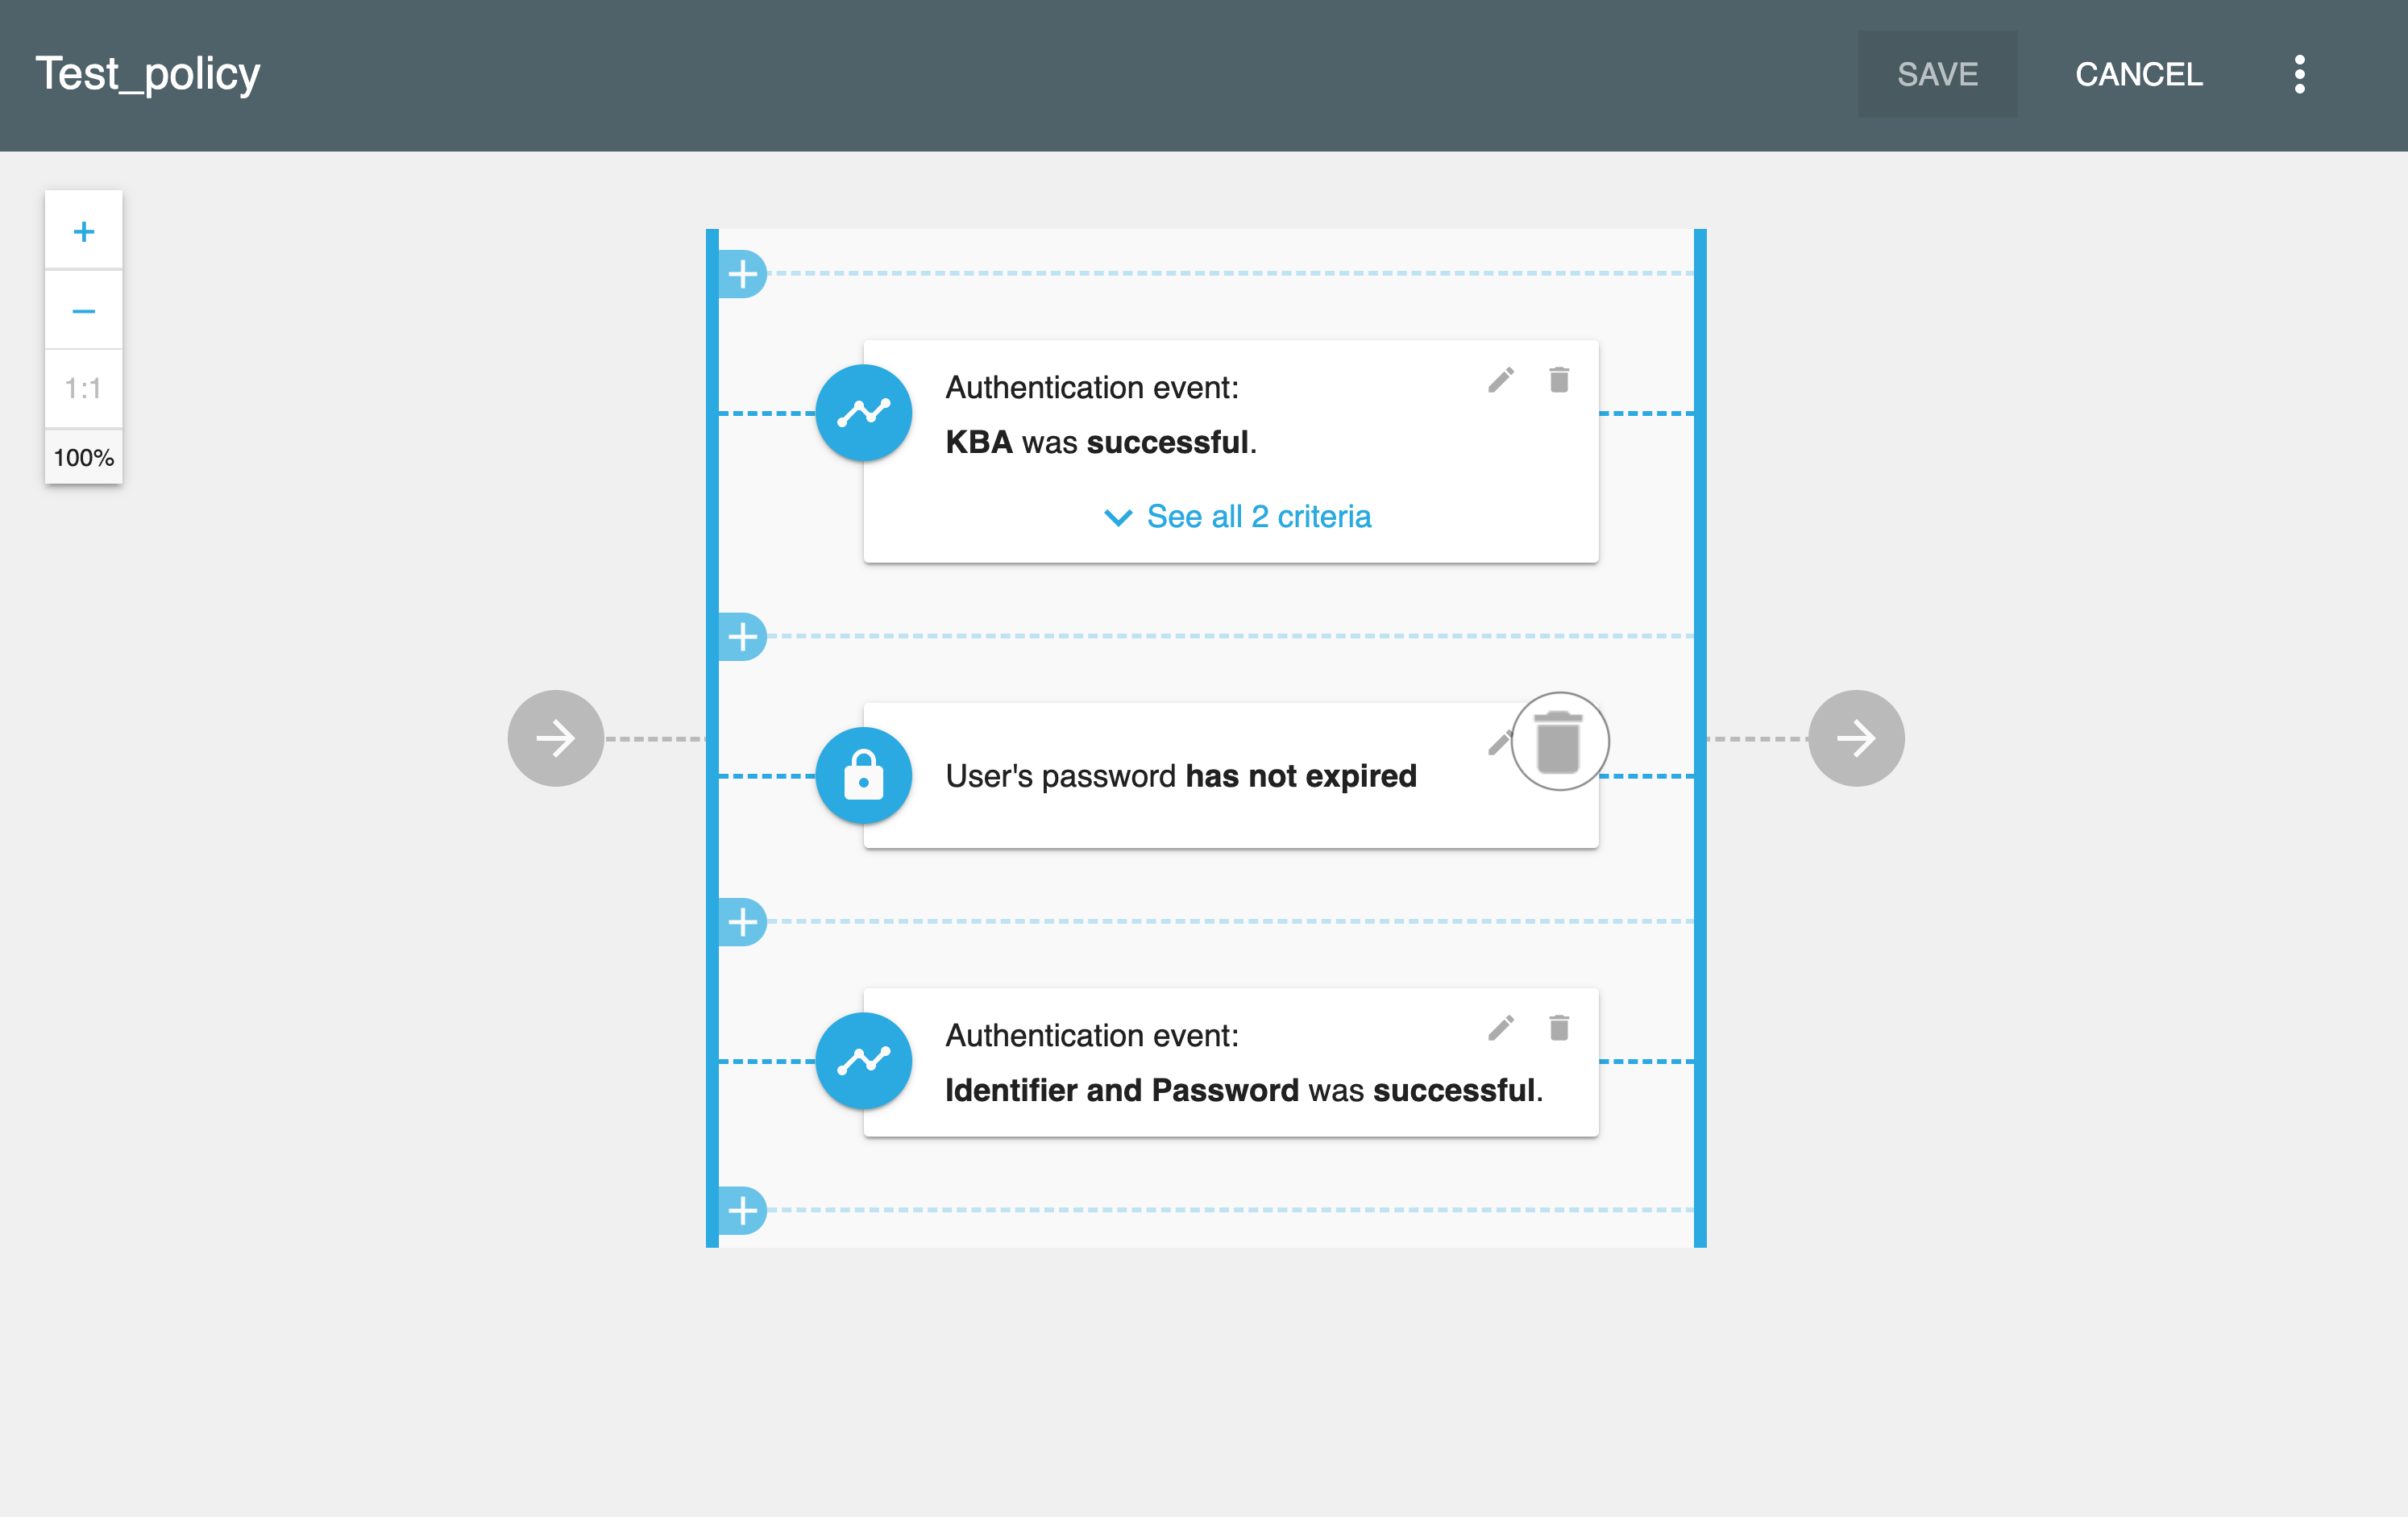
In the policy diagram, add, edit, or remove validators for your policy.
-
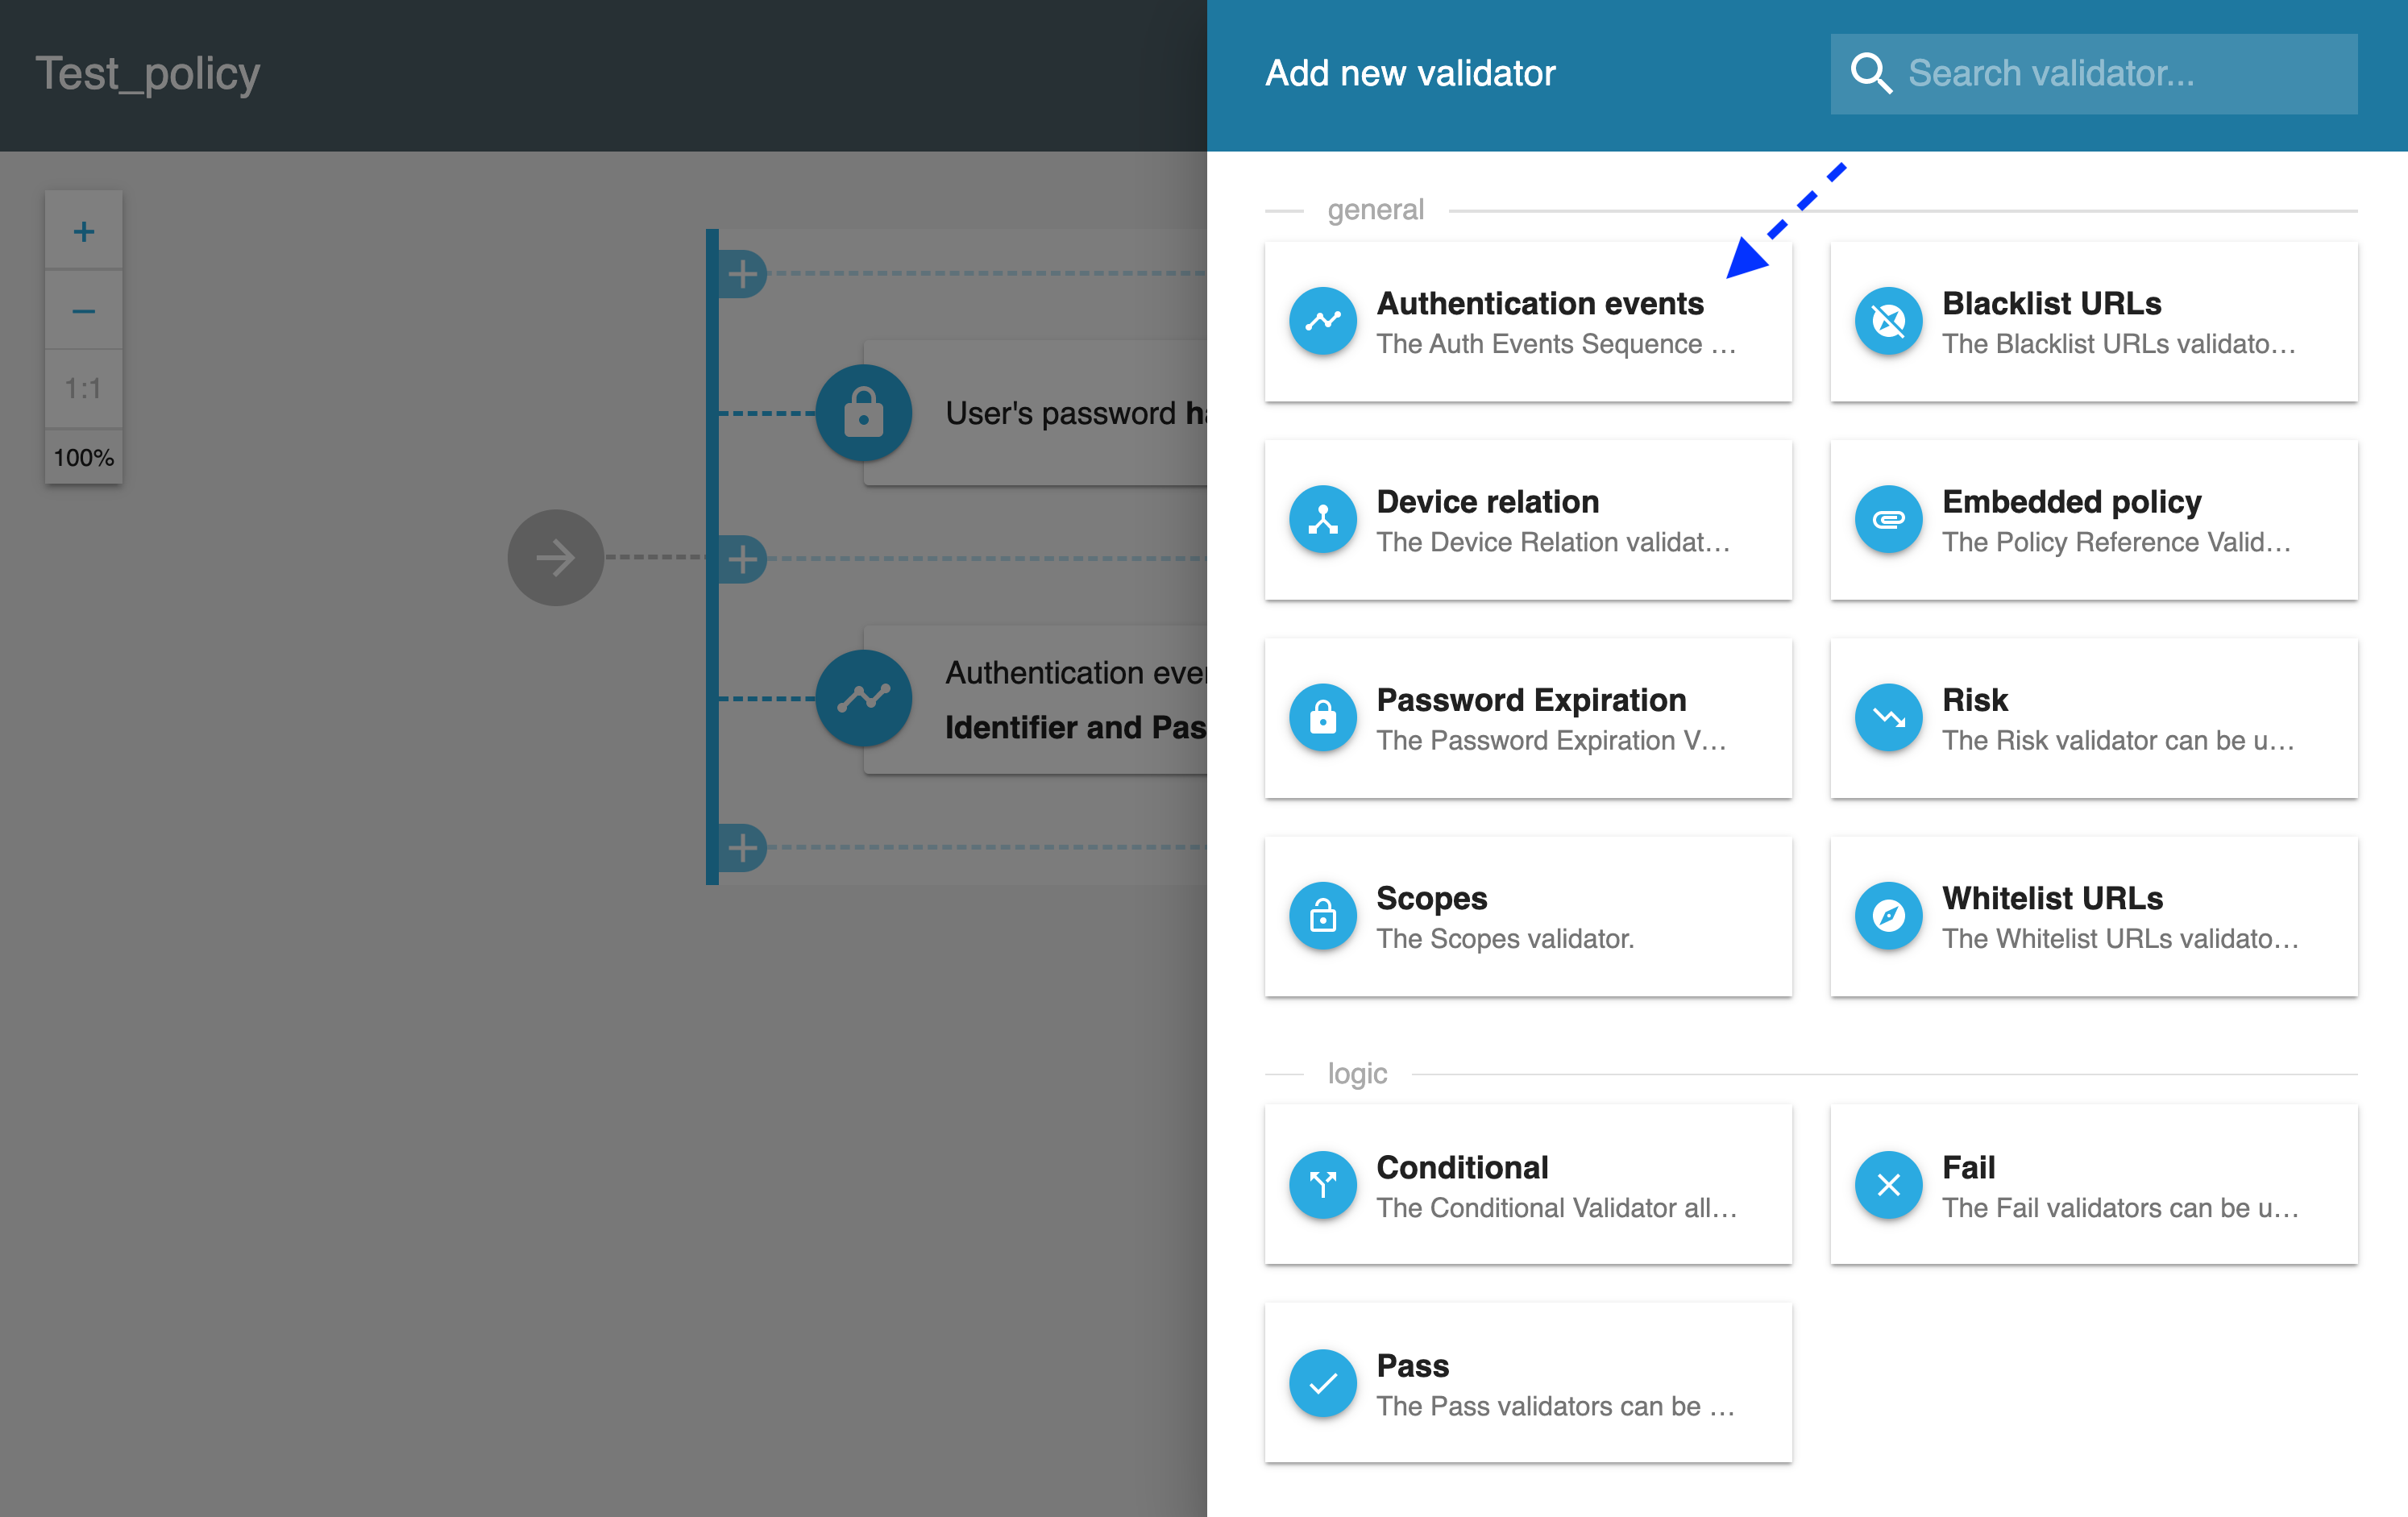
To add a new validator
-
Select the plus button (+ ADD VALIDATOR) in the policy diagram.
-
In the Add new validator fly-out box, select a validator to be added.
-
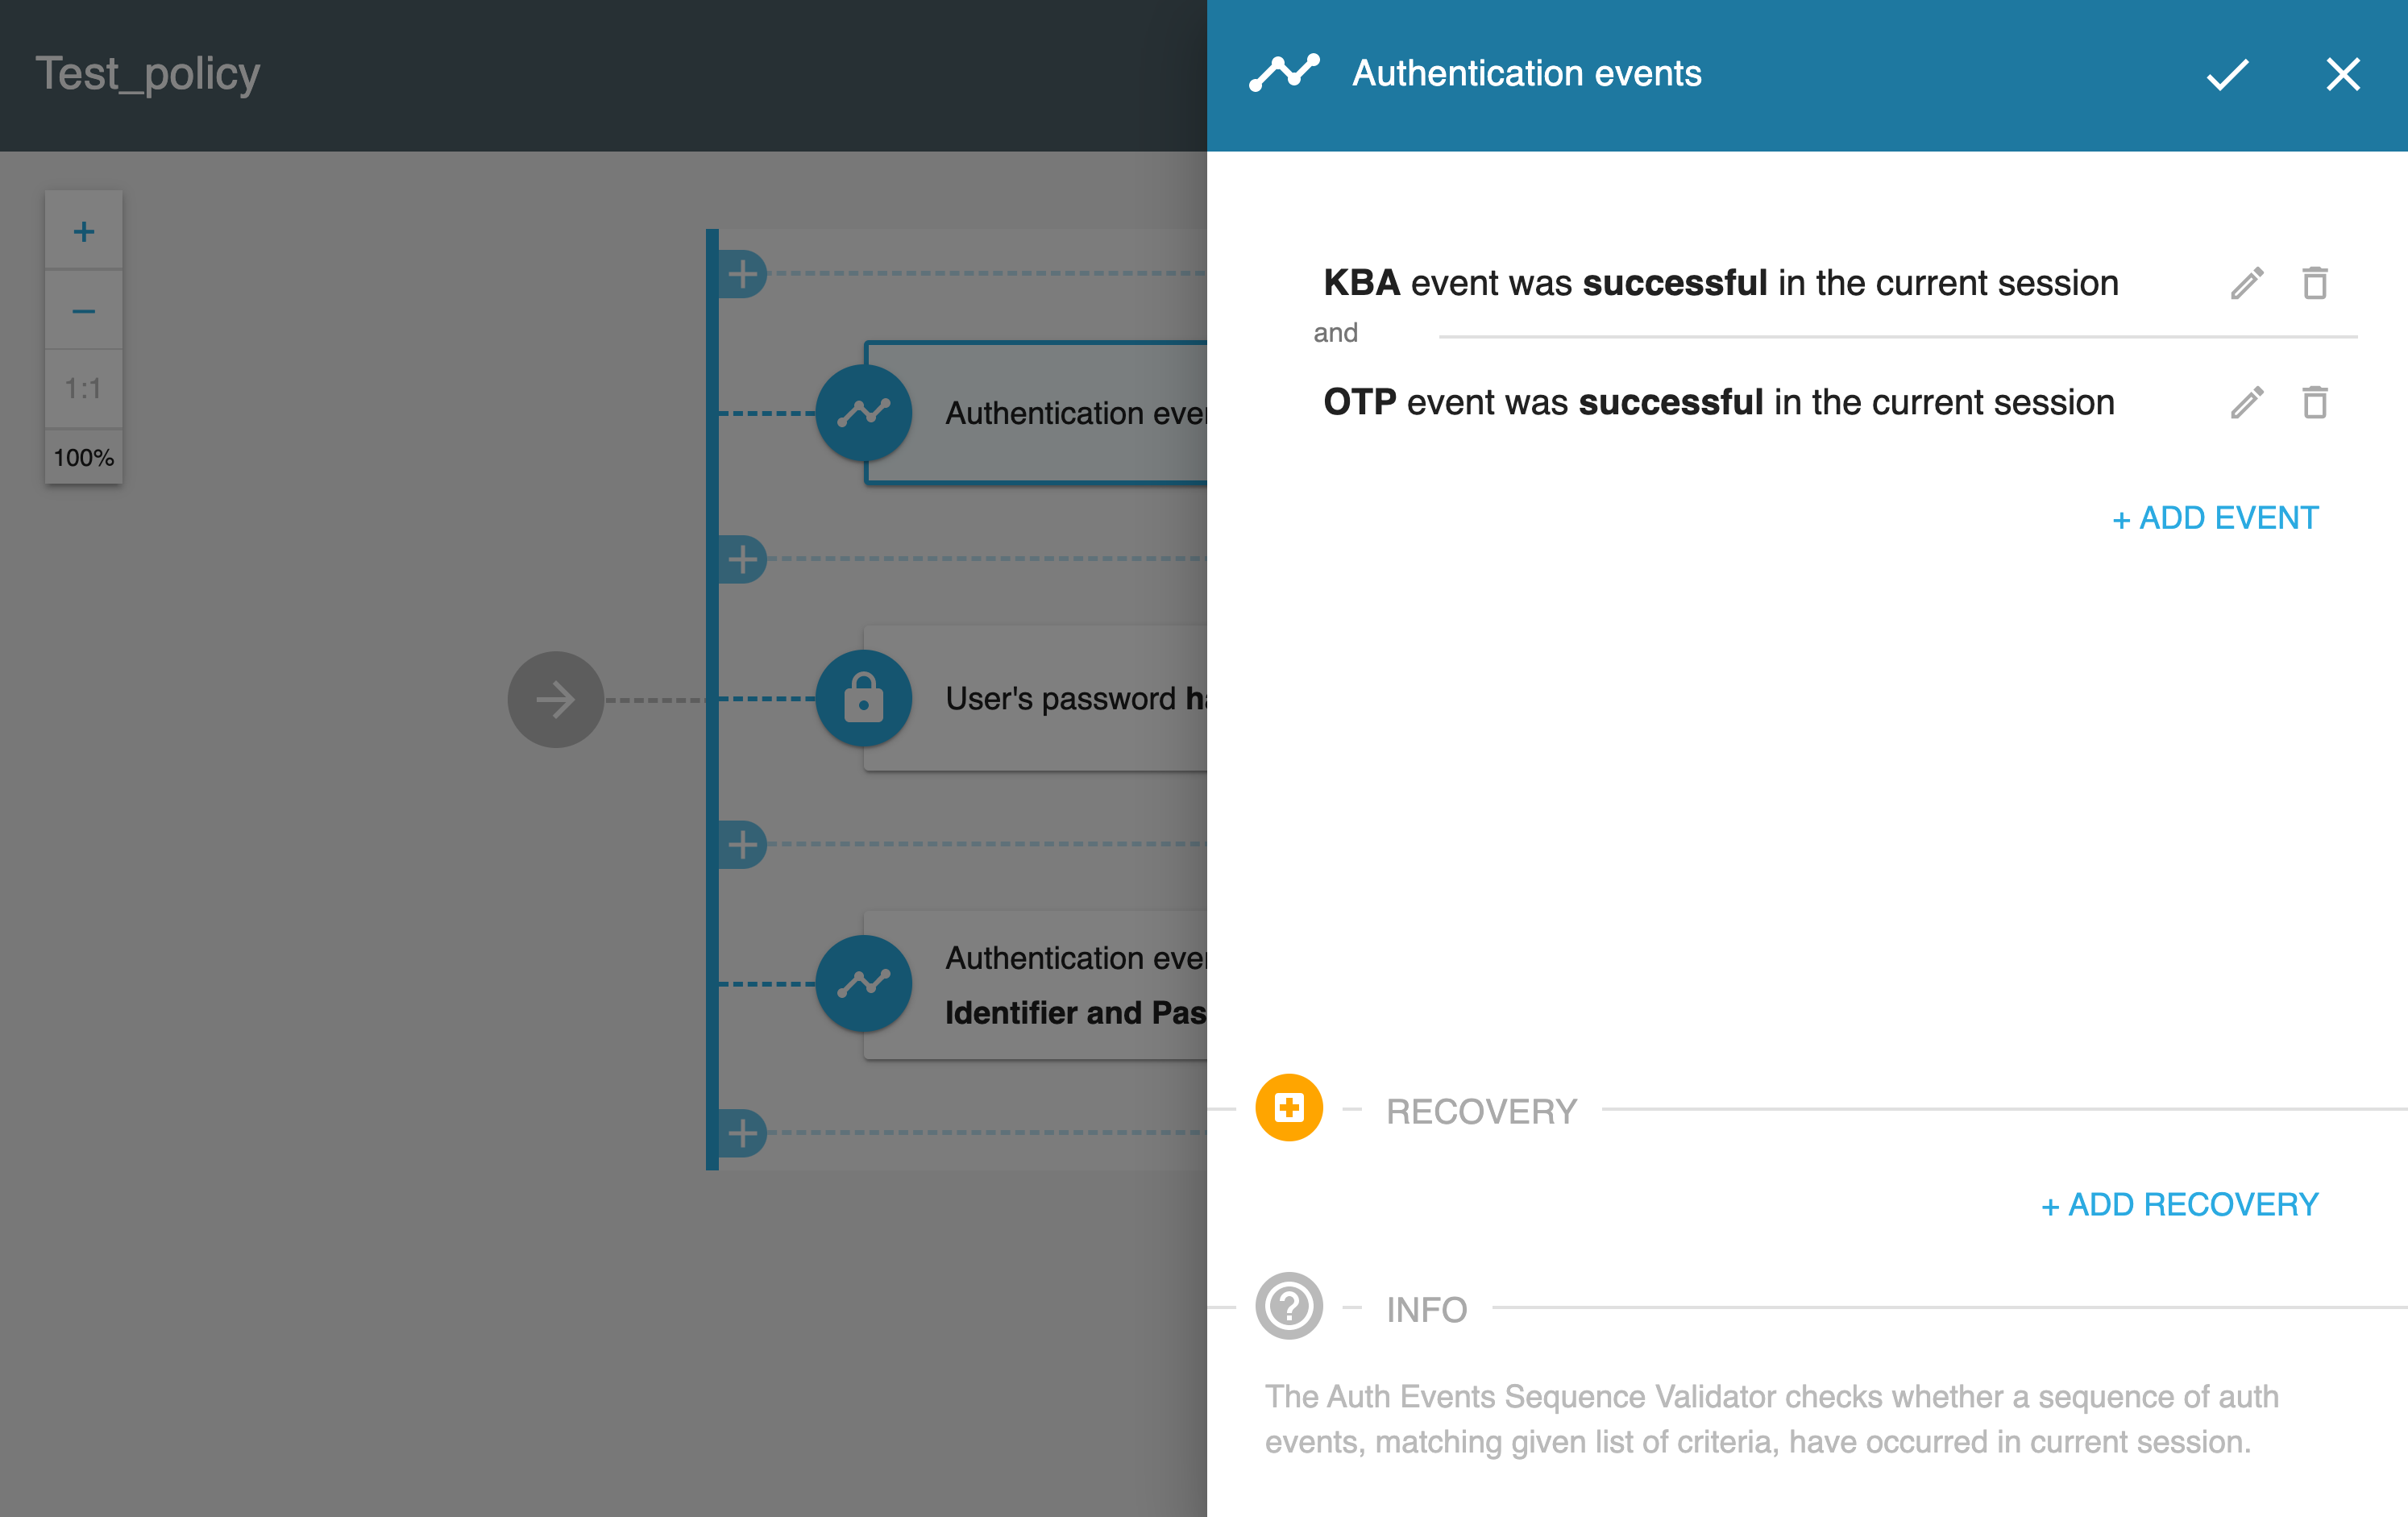
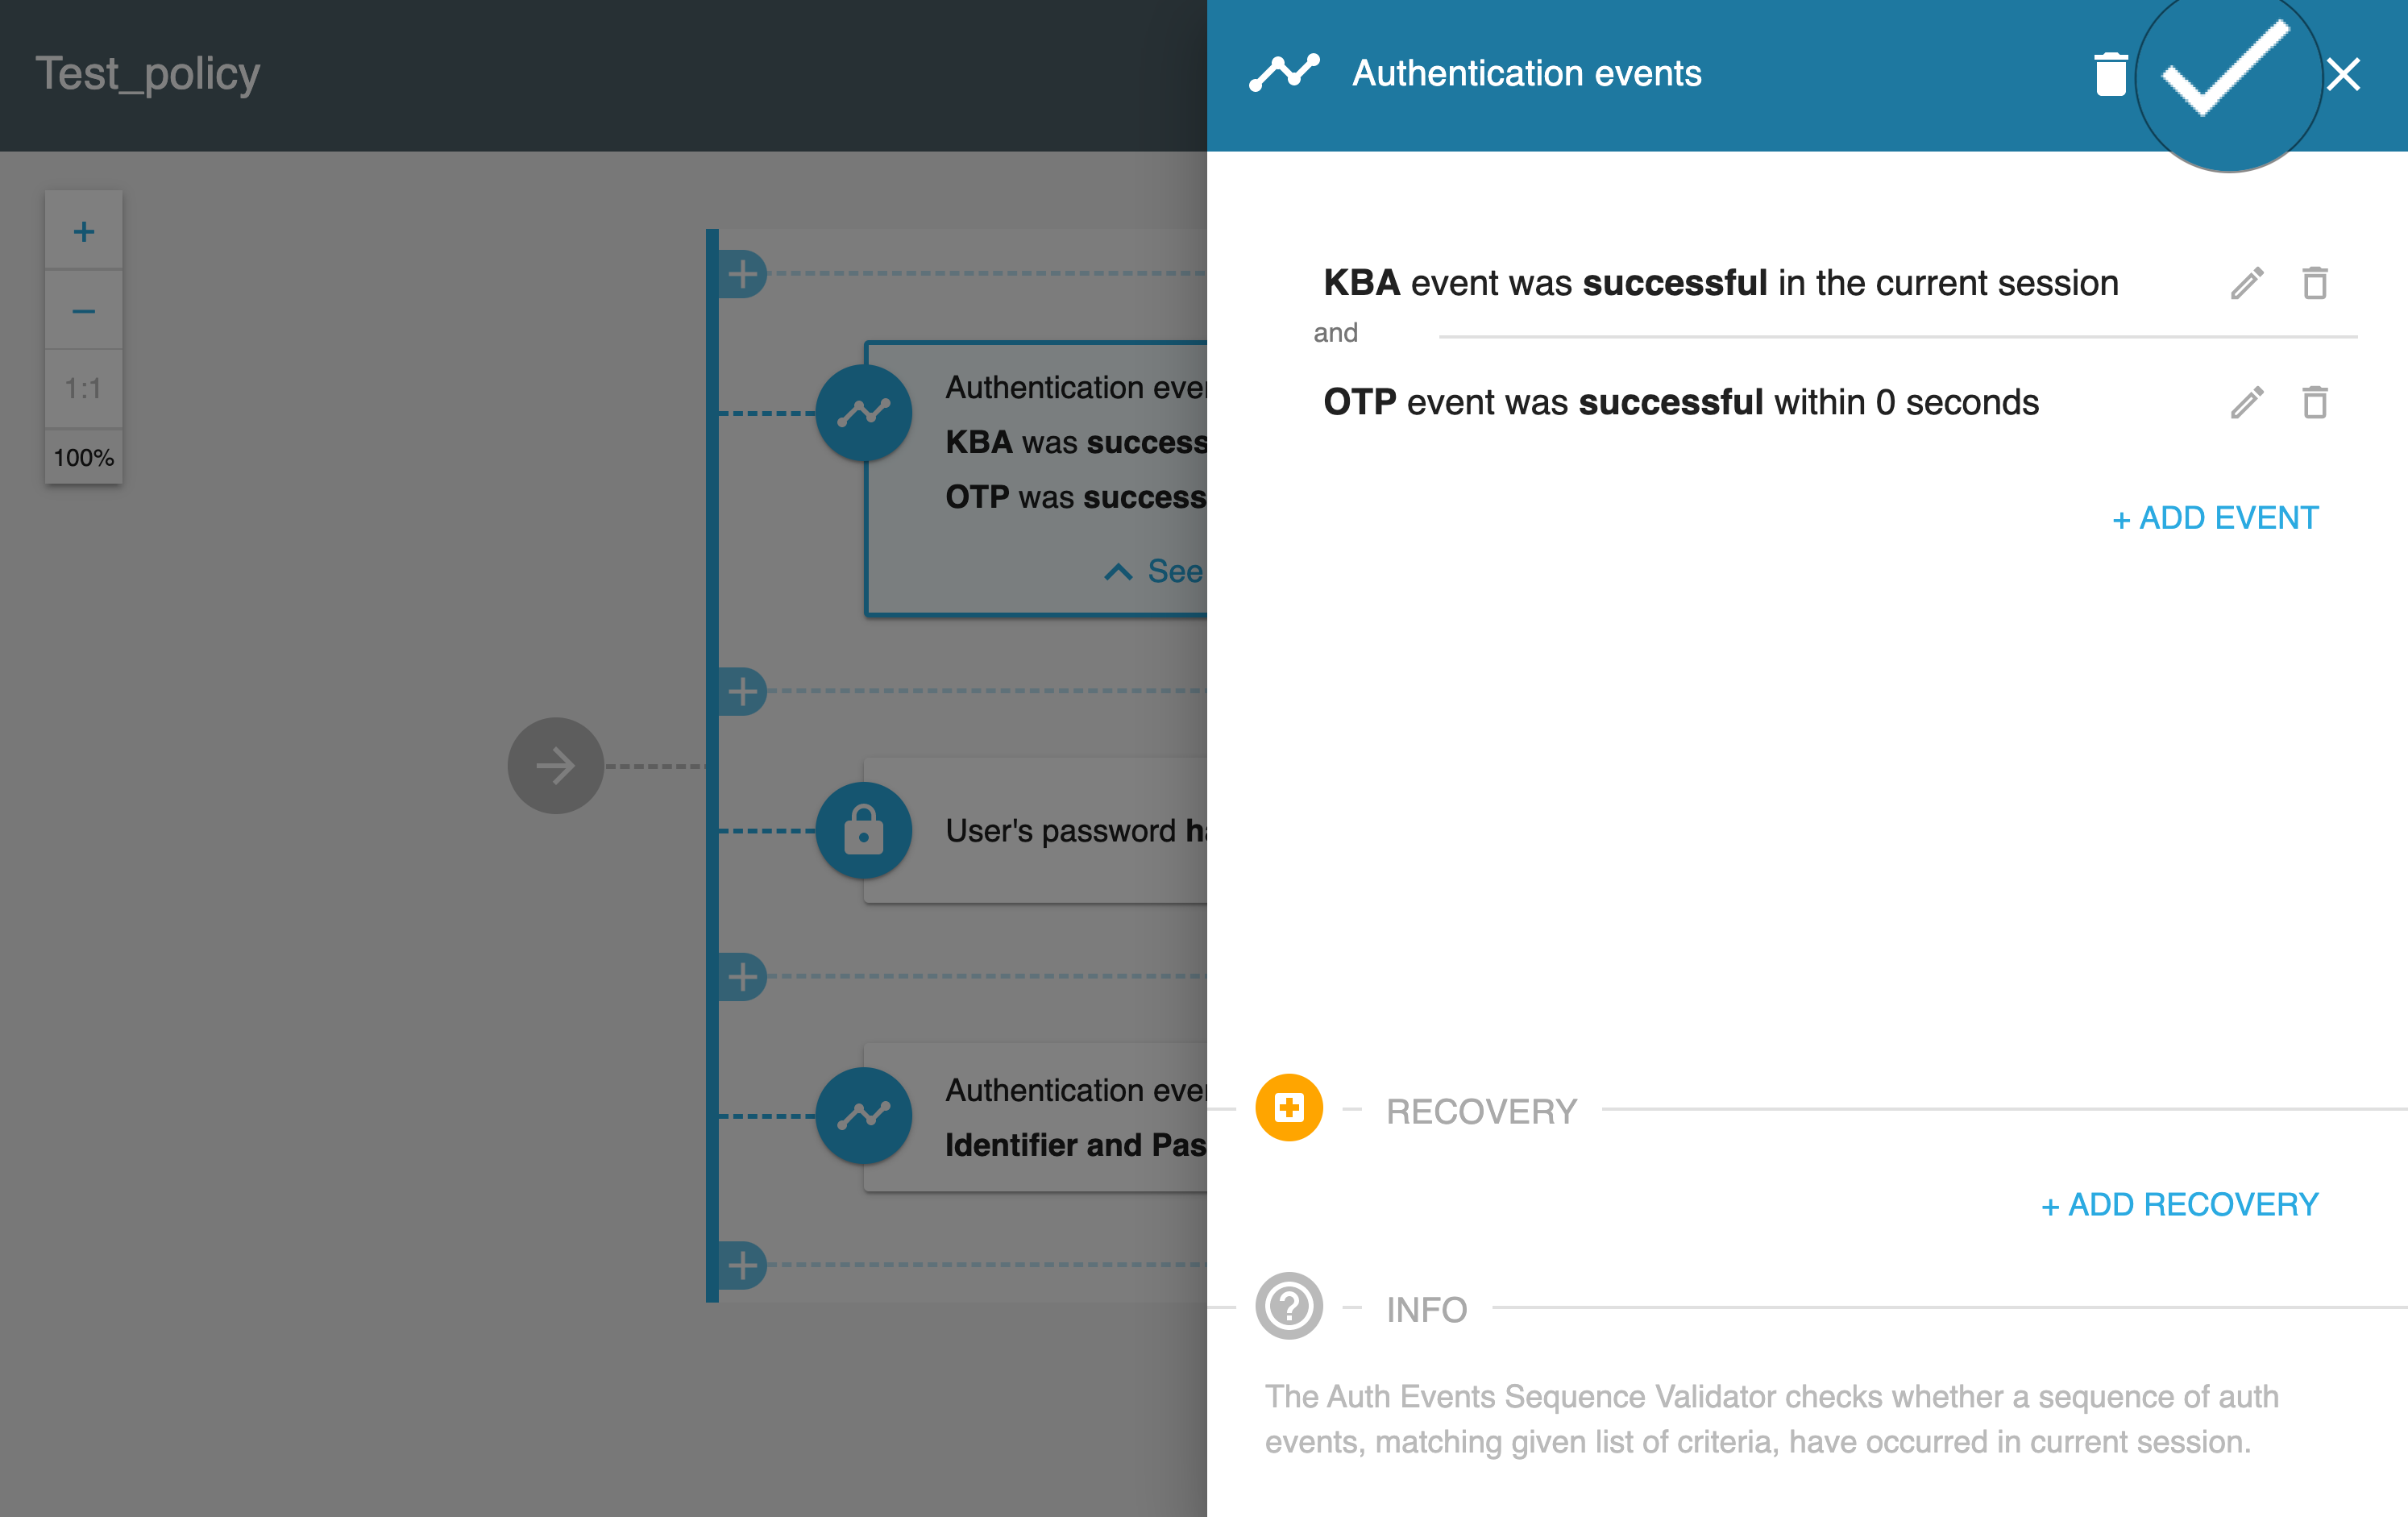
In the new validator editor box, configure the validator by, for example, adding, editing, or removing events.
-
To save the configuration for your new validator, select the check button in the new validator editor box.
-
-
To remove a validator
-
Select the trash can button in the validator box.
-
In the Confirm validator removal pop-up box, select REMOVE to confirm your choice.
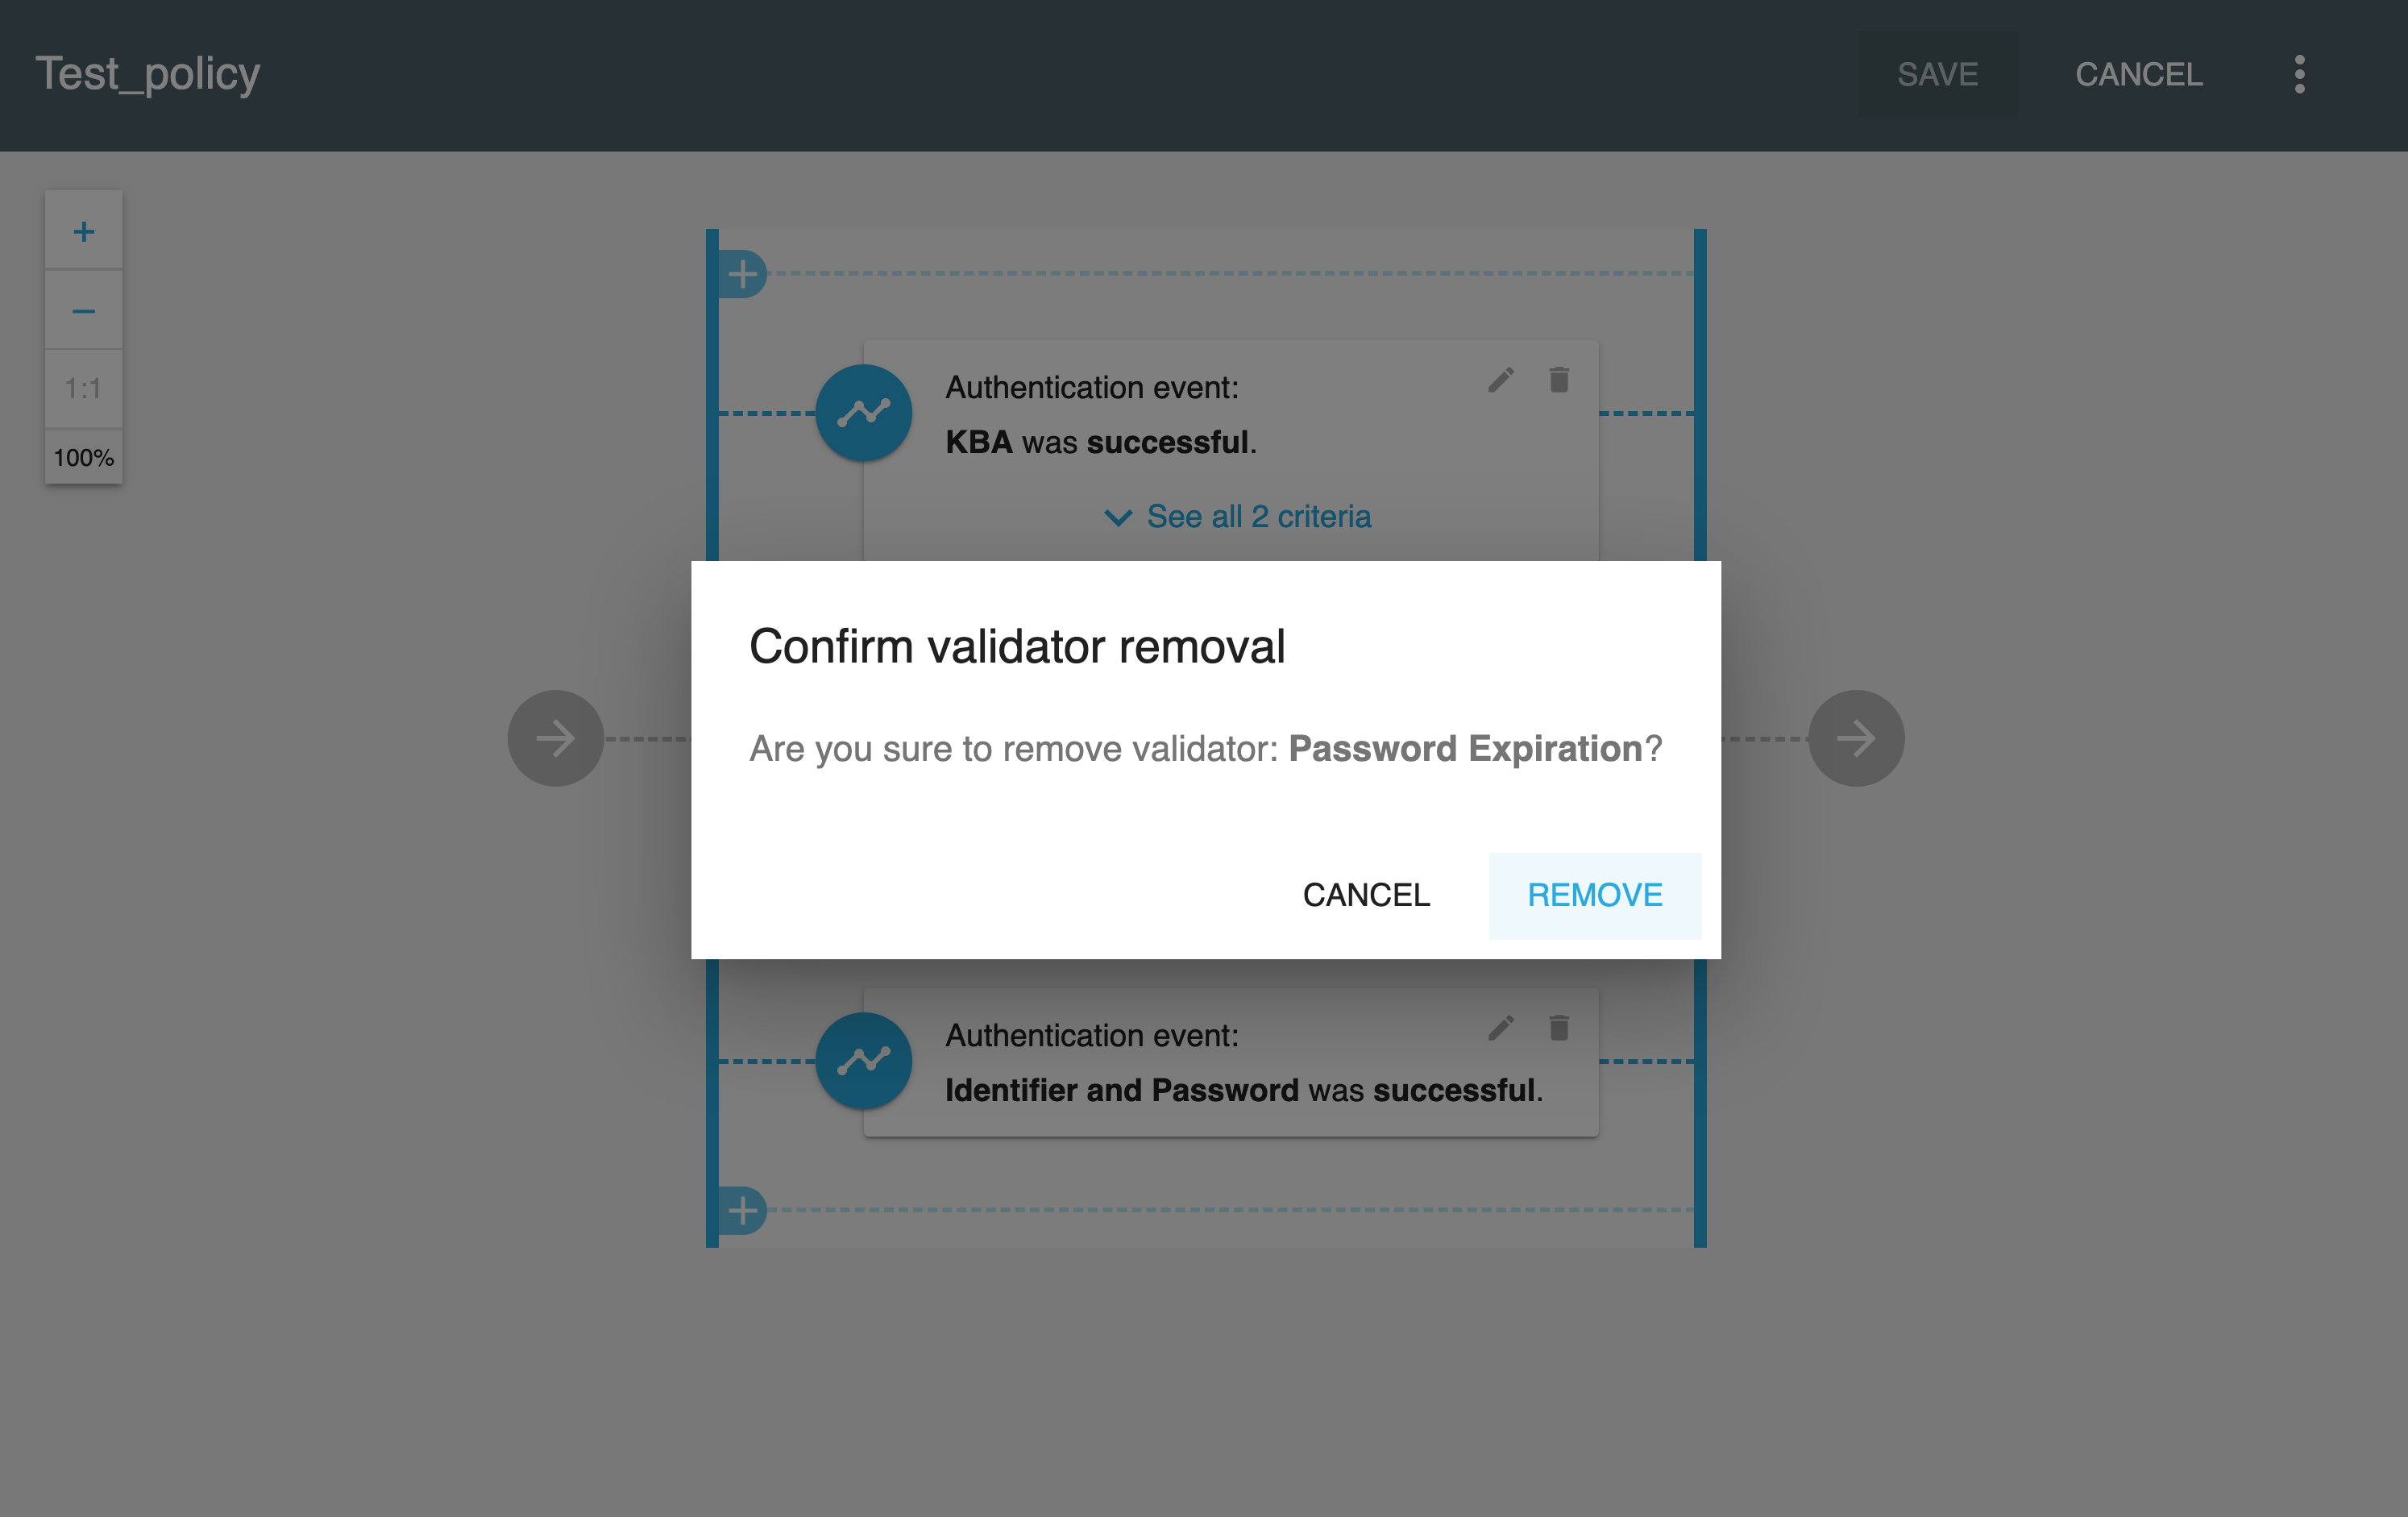
-
-
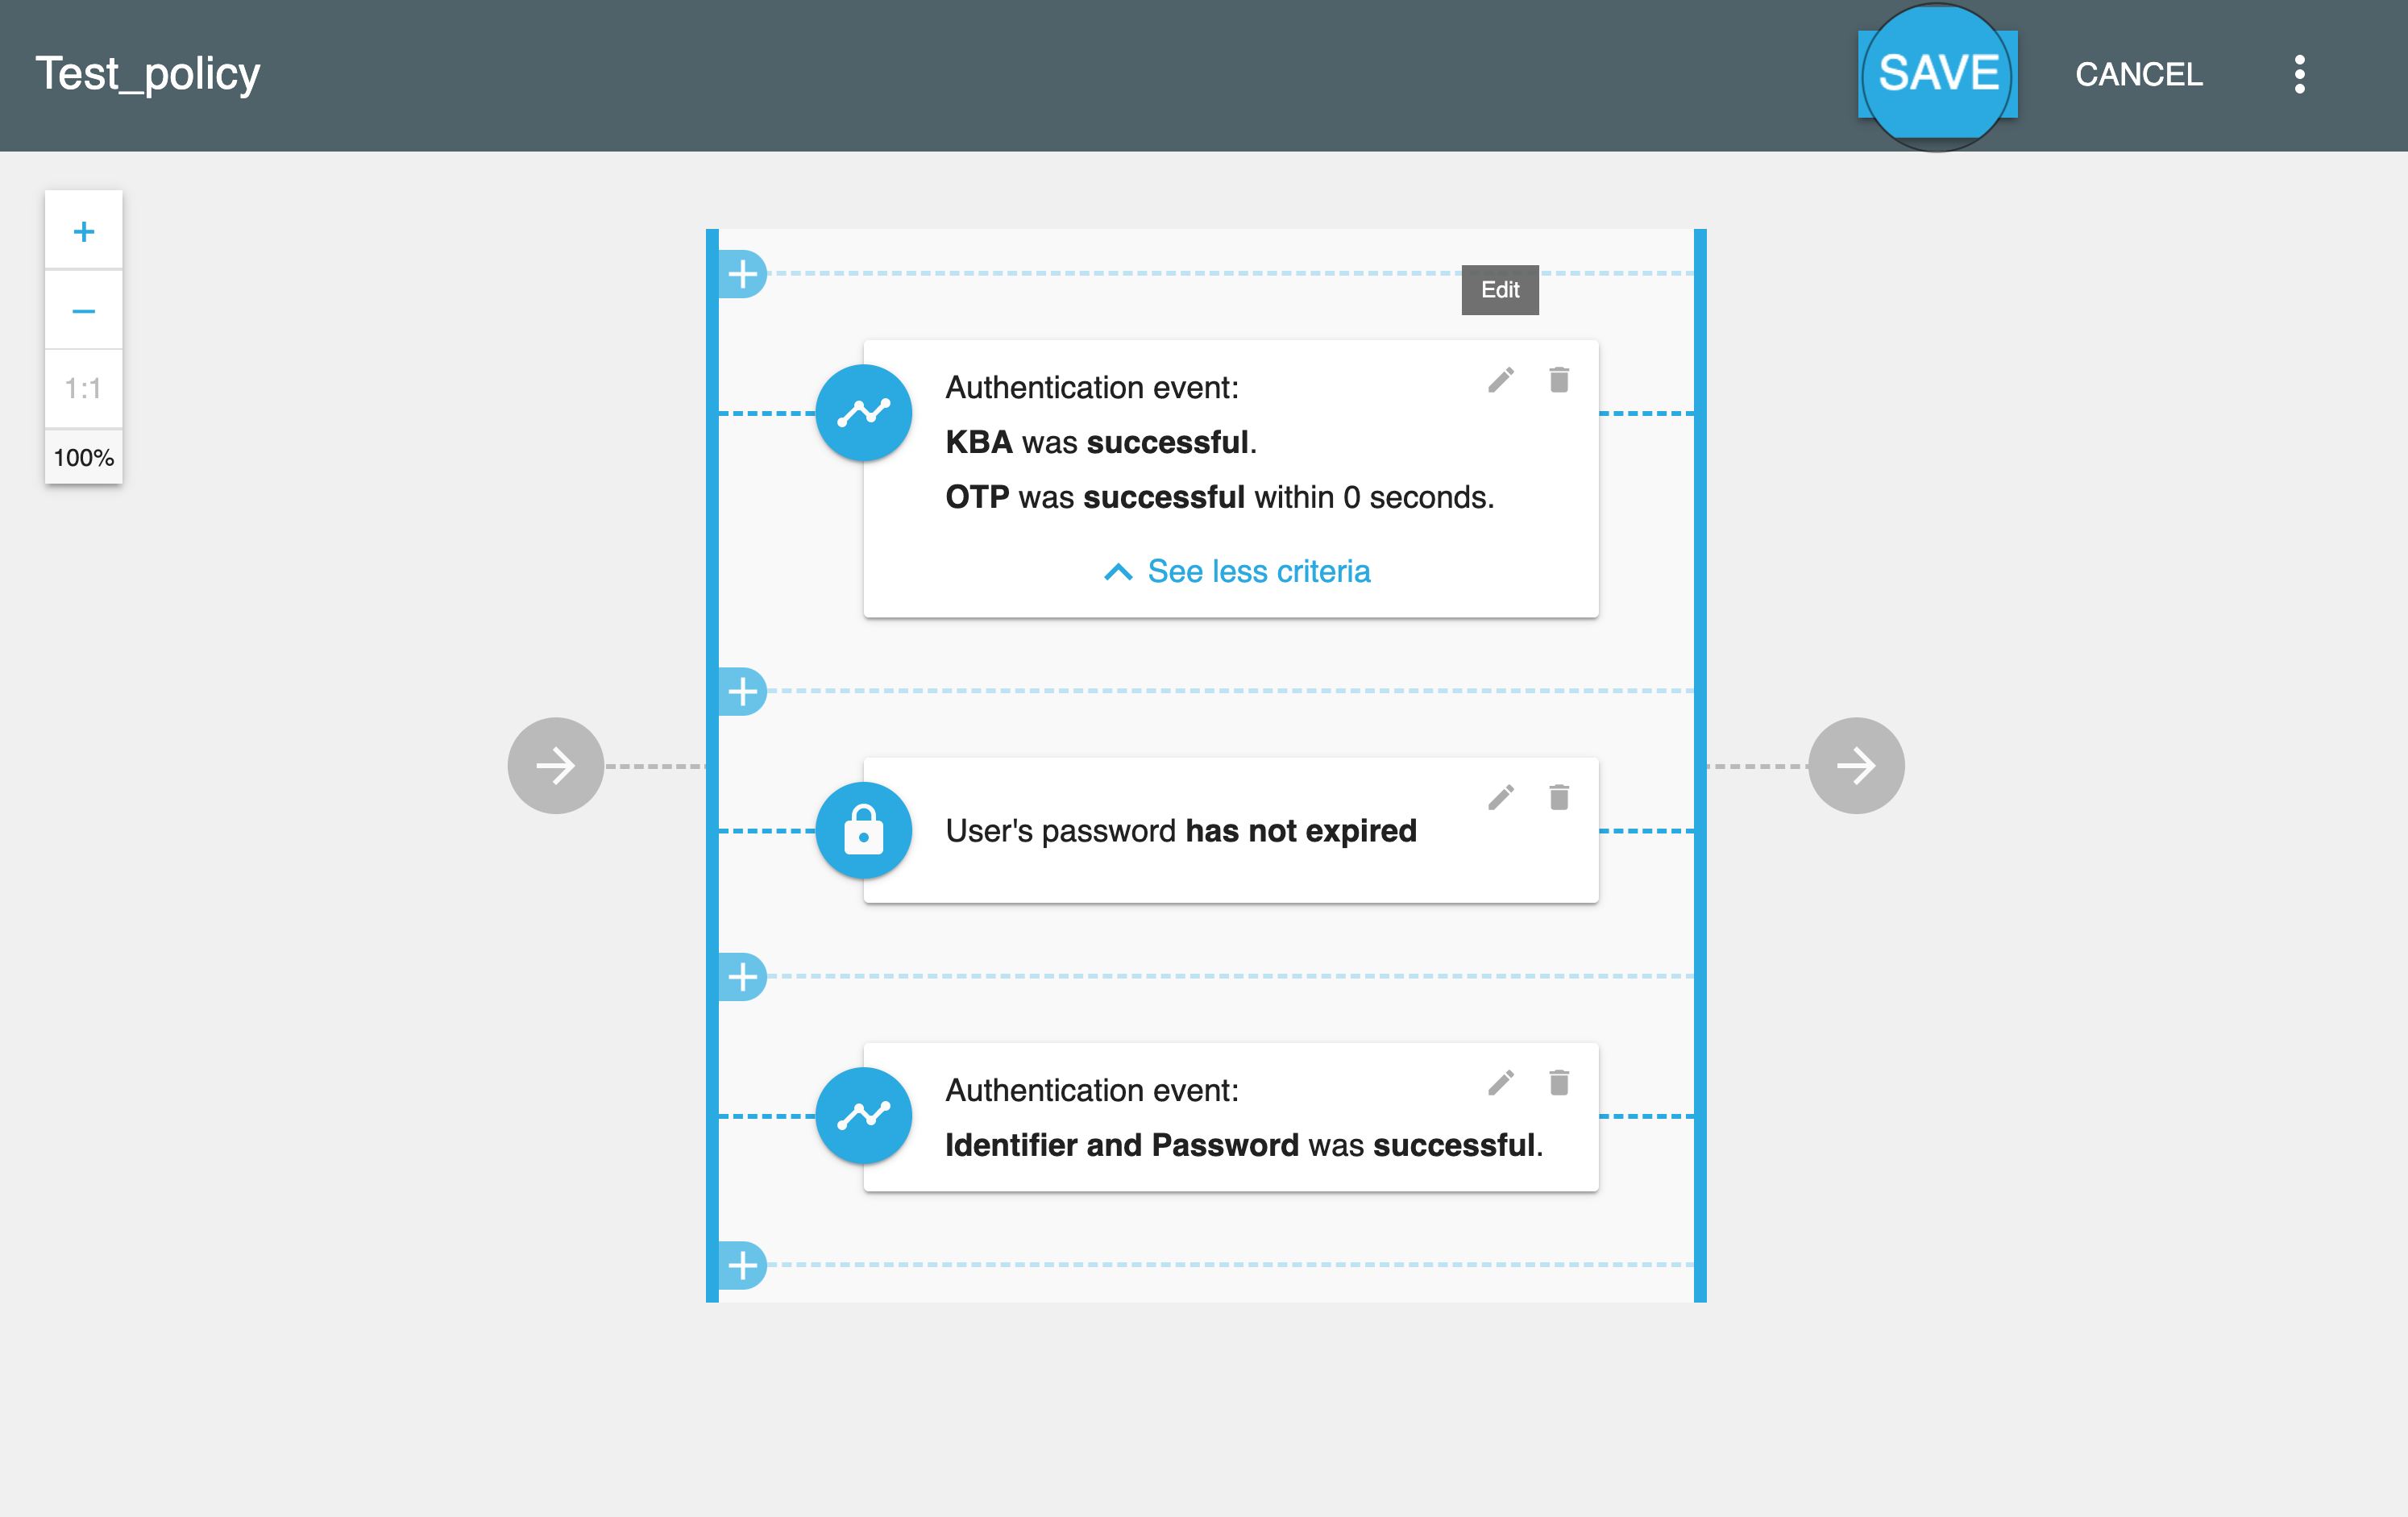
To edit an existing validator
-
Select the pencil button in the validator box.
-
Configure the validator using the validator editor, for example, by adding, editing, or removing events.
-
To save the changes for your new validator, select the check button in the new validator editor box.
-
-
-
To apply the new configuration for your policy, select SAVE in the policy diagram view.
Result
The configuration of your policy is now changed.