Salesforce SAML integration
This article explains how to configure Salesforce as an identity provider in Cloud Identity Plane
Salesforce as IDP
Salesforce can act as a single sign-on (SSO) identity provider to service providers, allowing end users to easily and securely access web and mobile applications with one login. When using SAML for federated authentication, enable Salesforce as an identity provider and then set up connected apps. Note that the OpenID Connect protocol for SSO authentication doesn’t require enabling Salesforce as an identity provider.
For further reference, check Salesforce IDP Documentation.
Tip
Contact your Salesforce administrators to ensure if your organization has enabled Salesforce as an IDP.
Set up Salesforce as IDP
-
Log in to Salesforce and set up the CIP platform as a connected app as shown in the pictures below.
-
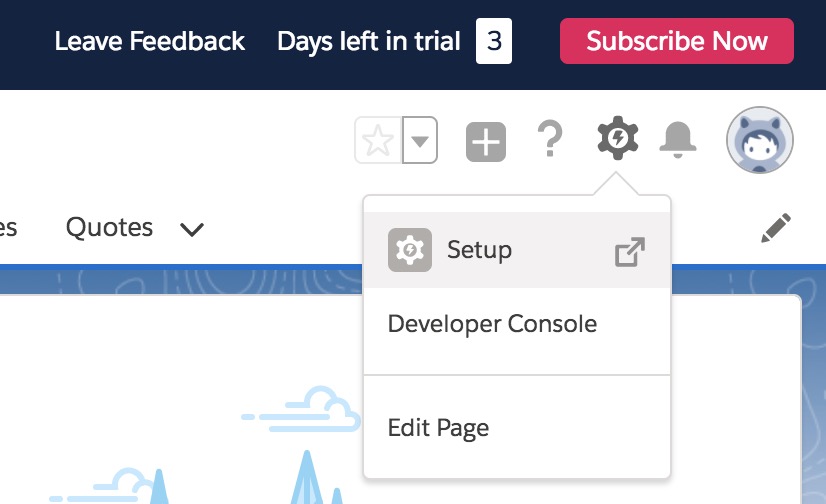
Select Setup.
-
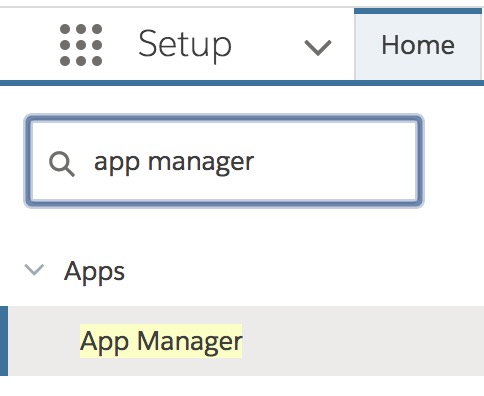
Look up and select App Manager.
-
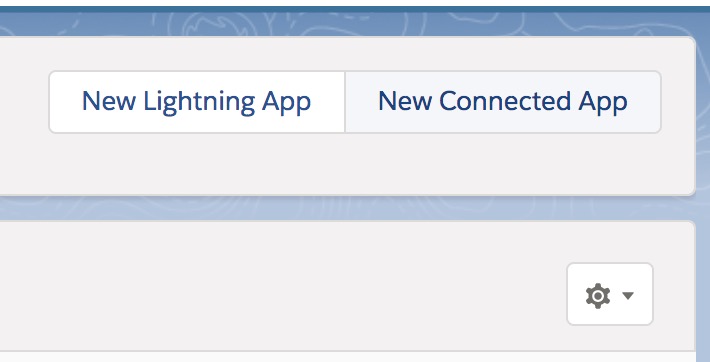
Register New Connected App.
-
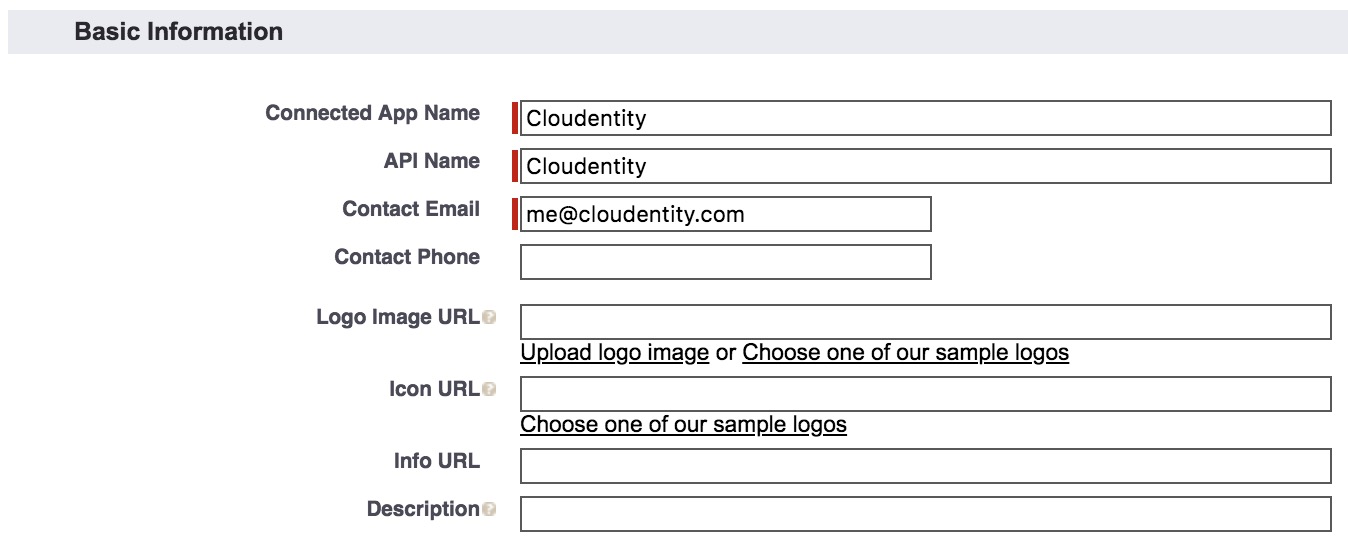
Fill in the Basic Information form.
-
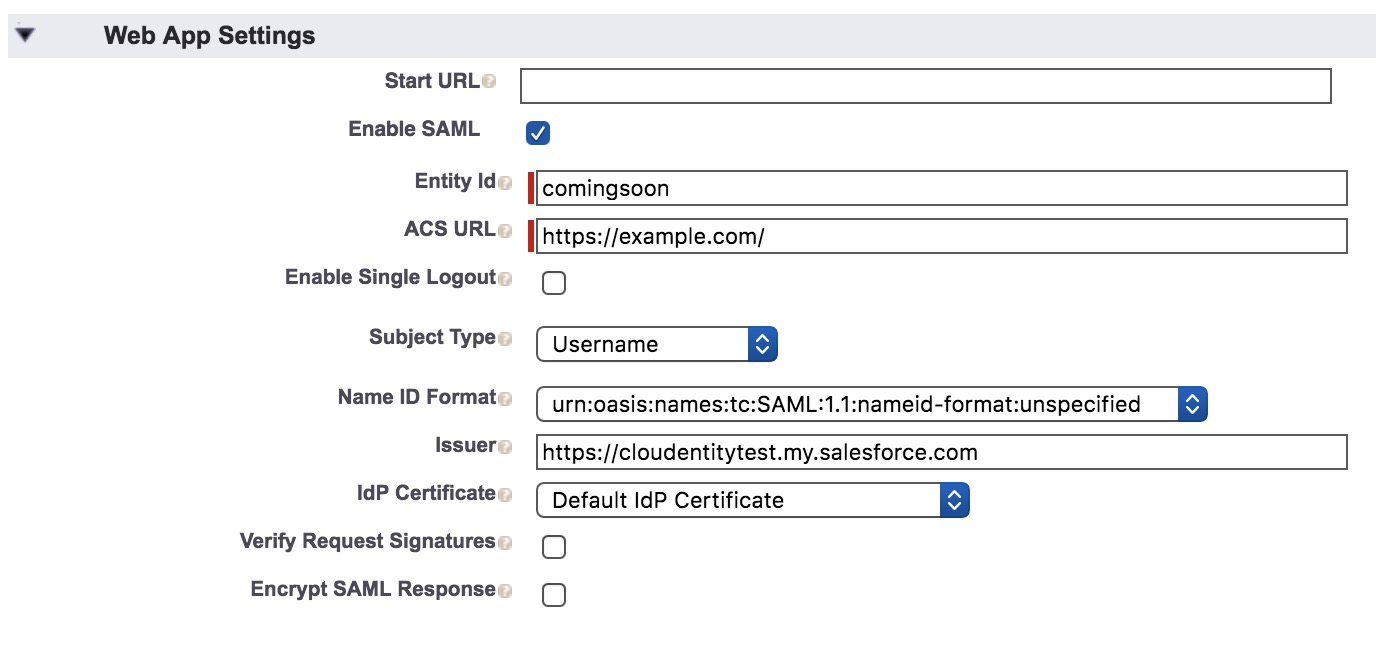
Fill in the Web App Settings form.
-
Save your changes.

-
-
Fetch Salesforce SAML metadata.
-
Select Manage.

-
Copy the metadata URL.

-
-
Register Salesforce as an external IDP in CIP. For additional information, see Configure external IDPs.
-
Download the CIP SAML SP metadata. For additional information, see Download SAML IDP metadata.
-
Upload the CIP SAML metadata to Salesforce. In the UI, select Salesforce login » Connected App » Cloudentity Connected App » Edit Polices.
Instead of uploading the metadata, Salesforce wants you to separately feed in information that is available within the metadata. For more information, read about SAML Metadata terms.
-
Select Edit policies.

-
Fill in the SAML Service Provider Settings form.

-
-
Configure the attributes that need to be released in Salesforce.
-
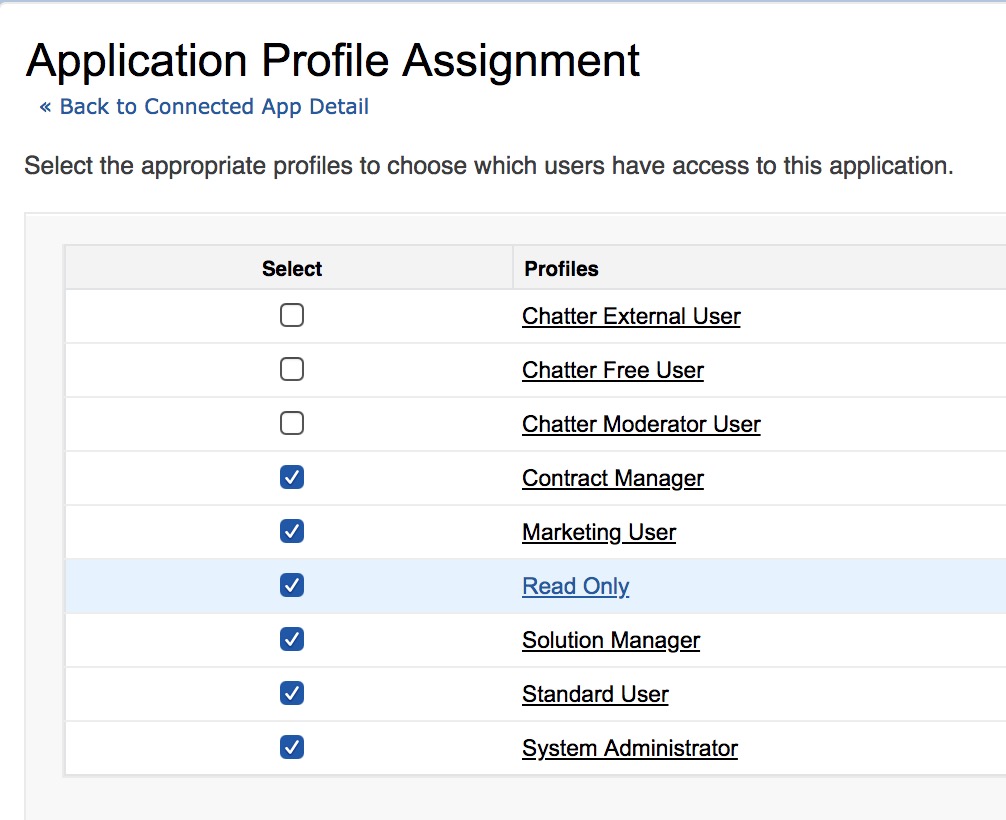
Select Manage Profiles.

-
Add the profiles as shown below.
-
Save your changes.

-
-
Verify the SAML authentication flow with Okta. For additional information, see Verify SAML authentication flow.